August 2026 DPA Newsletter
August 2026 DPA Newsletter:
Pulitzer-Winning Photographer David Hume Kennerly on Photographing the Jonestown Massacre,
Expert Advice on Candid Photography:
Get Great Pics of People in Their Own World,
Build Your Photography Library with Rocky Nook,
August FinerWorks Print Winners!
Interview: Pulitzer Prize-Winning Photojournalist David Hume Kennerly on Photographing Jonestown!
909 people died in the 1978 Jonestown mass murder-suicide orchestrated by cult leader Jim Jones.
At 79 years old, David Hume Kennerly discusses photographing the aftermath in his youth.
This is just one of seven interview segments exploring David’s career. Watch the full series as we continue preserving live interviews for future generations.
He has photographed wars, world leaders, cultural icons, and historic events around the globe. Our Celebrating Senior Shutterbug interviews cover this, as well as his work in the Vietnam War, India & Pakistan, and shooting presidents!
SUBSCRIBE
Watch more interviews with some of the world’s most accomplished photographers in their 70s, 80s, and 90s.
Hear their stories, insights, and memories spanning more than 60 years of photography, and see the award-winning images that defined their careers.
Primer of the Month:
Candid Photography – People in Their Own World
| Featuring photographs by Frank Siteman, Digital Photo Academy instructor in Boston, & Jerry Downs, Digital Photo Academy instructor in San Francisco. |
| Each month, we share a primer with insights on photography. It’s a chance to learn from through tips, advice, and a behind-the-scenes look at photography. |
A photograph of a person can reveal more when it captures a natural, unposed moment and includes the surrounding environment. Architecture, light, movement, shadows, and background details help show where the subject is, what they are doing, and how they relate to the space around them.
By observing carefully and composing the full scene—not just the person—a photographer can turn an everyday candid moment into a stronger visual story.
Here’s a guide to using composition to photograph people within their surroundings:
1. By Frank Siteman, Digital Photo Academy instructor in Boston.

Frank uses negative space by keeping the people small and placing them in a narrow band near the lower third of the frame. The broad areas of open sky, water, and reflective sand emphasize the scale of the beach while preventing the scattered figures from feeling crowded.
Keeping the horizon relatively low gives the cloud-filled sky most of the frame, while the reflections extend the small figures downward and make them more noticeable without increasing their size. The people are also spaced apart rather than overlapping, so each remains readable against the simple shoreline.
To apply this approach, step back from the subjects, lower the horizon, and allow the surrounding environment to occupy most of the composition. the main subject near one third of the frame and letting secondary elements occupy the opposite side or lower edge.
2. By Frank Siteman, Digital Photo Academy instructor in Boston.

This image uses panning, with the camera moving alongside the red car during the exposure. The car remains relatively recognizable while the street and buildings stretch into horizontal blur, separating the vehicle from a visually busy setting.
Blur in the wheels and along the edges of the car establishes speed, while the stronger background streaks show that the camera was following the vehicle rather than remaining stationary. The car is also given additional space on the right side of the frame, reinforcing its direction of travel.
A photographer can recreate this by selecting a moderately slow shutter speed—often somewhere around 1/15 to 1/60 second as a starting point—and smoothly following the subject throughout the exposure.
3. By Frank Siteman, Digital Photo Academy instructor in Boston.

Frank uses lead room by positioning the woman and scooter on the left side while leaving more open space in front of her movement. Because she is traveling toward the right, that space gives her a clear visual path through the frame.
Her body, extended leg, and scooter all point in the same direction, making the intended movement immediately understandable. The softly blurred background supports that motion, but the placement of the subject is what prevents her from appearing boxed in or too close to the edge.
When photographing movement, anticipate where the subject is going and compose with more room in front of the subject than behind it.
4. By Frank Siteman, Digital Photo Academy instructor in Boston.

This composition relies on repetition, with five standing figures arranged at intervals across the beach. Their similar upright forms create a visual rhythm, while the second person’s sharply leaning gesture breaks the pattern and becomes the main point of interest.
Frank’s position as the photographer keeps the figures separated rather than overlapping, allowing each silhouette and body position to be read clearly against the relatively plain water and sky. Their placement along roughly the same horizontal level also ties the group together despite the differences in clothing and posture.
A similar effect can be created by identifying repeated shapes or poses, then waiting for one subject to introduce a noticeable variation., color, and pattern of the subject itself, so the photographer fills the frame instead of leaving extra empty space.
5. By Frank Siteman, Digital Photo Academy instructor in Boston.

The stone jetty creates strong leading lines that begin in the lower foreground and narrow toward the fisherman. Its receding edges guide the viewer directly through the frame, while the line of large rocks on the right reinforces the same direction.
Because the foreground stones appear large and gradually become smaller, the perspective produces a strong sense of distance between the camera and the figure. The fisherman is placed close to the point where these lines visually converge, making the small subject easier to locate within the wide landscape.
To use this technique, position the camera so the edges of a road, walkway, shoreline, or structure begin near the bottom of the frame and point toward the subject; a lower camera position can make the convergence more pronounced.
6. By Frank Siteman, Digital Photo Academy instructor in Boston.

The image uses a centered composition, placing the customer directly beneath the food trailer’s serving window. The trailer fills most of the frame, and its broad rectangular shape creates a stable structure around the person.
Centering works here because the window, awning, counter, wheel, and curved ends of the trailer establish a strong geometric framework, with the customer acting as the central visual anchor. Photographing the trailer from a mostly straight-on position also keeps its horizontal and vertical edges orderly rather than introducing strong perspective distortion.
This approach is effective when the surroundings contain balanced architecture or repeated geometry that can support a subject placed in the middle.
7. By Jerry Downs, Digital Photo Academy instructor in San Francisco.

Jerry uses a frame within a frame by positioning the two people inside the opening created by the dark iron gates. The gate’s vertical bars, curved upper edges, and surrounding shadows form a strong border around the brightly lit building in the distance.
Because the foreground is underexposed relative to the exterior, the people and gate become silhouettes, simplifying them into clear shapes while directing attention toward the white structure. The nearly symmetrical placement of the gates strengthens the effect and makes the figures appear to be entering the scene.
To apply this technique, photograph through a doorway, arch, gate, or window and expose for the brighter area beyond it.
8. By Jerry Downs, Digital Photo Academy instructor in San Francisco.

This image uses scale and proportion by placing a small pedestrian beneath the much larger palm trees and their oversized shadows. The person provides a familiar reference point, making the trunks, wall, and projected palm shapes appear especially large.
Jerry also leaves most of the frame to the architecture and shadows rather than moving closer to the pedestrian, which emphasizes the relationship between the individual and the environment. Strong directional sunlight produces clearly defined shadows that remain recognizable as extensions of the trees.
To create a similar composition, include a person or another familiar object at a small scale within a much larger setting.
9. By Jerry Downs, Digital Photo Academy instructor in San Francisco.

Jerry creates depth through layering, arranging the real visitor in the foreground, the mural directly behind her, and the painted landscape farther back within the artwork. The viewer’s dark cap and blue clothing clearly separate her from the warmer, more detailed mural, while her position makes it appear that she is observing the painted group.
Architectural elements on both sides add additional layers: the curved mosaic edge enters from the left, while the carved wall forms a vertical boundary on the right. This arrangement allows the photograph to show both the artwork and a person’s interaction with it without flattening everything into one plane.
To apply this technique, look for distinct foreground, middle-ground, and background elements that overlap without obscuring the main subject.
10. By Jerry Downs, Digital Photo Academy instructor in San Francisco.

This photograph uses one-point perspective, with the floor edges, walls, and repeated brick arches visually narrowing toward a single area near the distant figure. The running child is positioned close to the central axis, so the surrounding architecture directs attention toward and beyond the silhouette.
Each arch appears progressively smaller, providing clear distance cues and making the corridor feel much deeper than it would in a flatter, side-on view. Jerry stood near the center of the passage and kept the camera relatively level to preserve the orderly convergence of the architectural lines.
To reproduce this effect, photograph straight down a corridor, bridge, or covered walkway and align the camera with its central vanishing point.
11. By Jerry Downs, Digital Photo Academy instructor in San Francisco.

The composition relies on backlighting to turn the guitarist into a distinct silhouette against the bright tunnel entrance.
Exposing for the daylight outside preserves detail in the steps and vegetation while allowing the interior walls and the person’s front-facing side to fall into deep shadow. This removes distracting detail from the musician and makes the outline of the head, arms, guitar, and legs easy to recognize.
The bright opening also acts as a large tonal backdrop, providing strong separation between the figure and the environment.
To create a similar result, place the subject between the camera and a bright opening, then meter for the illuminated background rather than the subject.
12. By Jerry Downs, Digital Photo Academy instructor in San Francisco.

Jerry uses reflections on the polished airport floor to extend the people, windows, railings, and signs downward through the composition. The reflected silhouettes nearly double the visible height of the standing and seated figures, making them more prominent even though they occupy relatively small areas of the frame.
Vertical architectural elements are repeated across the floor, creating a visual connection between the bright windows above and the lower half of the image. A low shooting position helps include more of the reflective surface and makes the mirrored shapes longer and easier to see.
To apply this approach, look for polished floors, wet pavement, glass, or still water and adjust the camera angle until the reflected subject is clearly separated from surrounding shapes.
Build Your Photography Library with Rocky Nook
One of our personal recommendations for photo literature!

Rocky Nook is a small publishing team that creates practical books for photographers and other creative people.
Their photography titles cover everything from camera basics and editing to lighting, composition, creativity, and the business side of photography.
They also publish books and host events covering drawing, painting, sewing, and other arts. Whether you are just getting started with photography or have been taking pictures for years, we recommend checking out their collection for helpful advice, inspiration, and new ideas.
August FinerWorks Award Winners!

Every month, our judges select 2 of our social media members to receive an HD Metal print of one of their photos, printed by our sponsor Finerworks.
We choose one winner from each of our Facebook groups:
“Celebrating Senior Shutterbugs” and “Digital Photo Academy Community”
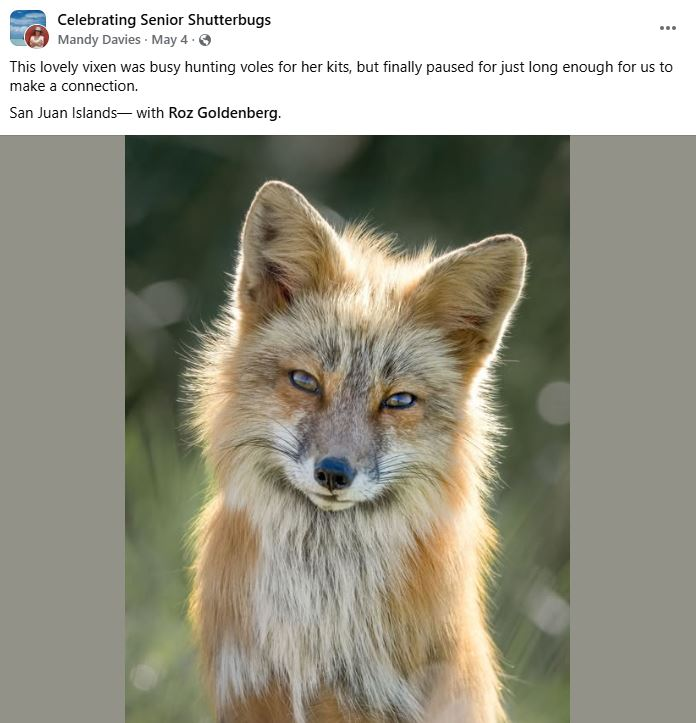
Posted on our “Celebrating Senior Shutterbugs” Facebook group by Randall Patterson:

Posted on our “Digital Photo Academy Community” Facebook group by Bob Swanson:

Monthly Small-Group Photo Workshops in 24 Cities
Plus Private Classes on Your Schedule
Since 2006, Digital Photo Academy has offered hands-on photography workshops in 24 cities across North America.
Access the live cities page on our website to explore upcoming photo workshops in your area. Elevate your photography skills with help from our experienced instructors in interactive sessions!
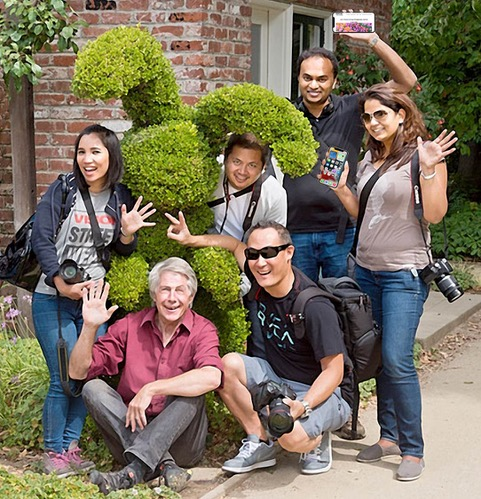
Our Social Media
Share your own original images in our Facebook groups, and you’ll be automatically entered into our monthly FinerWorks prize contest.
Each month, our judges pick two winners, and FinerWorks prints their photo on a beautiful HD Metal print that can hang on the wall.
Join our Facebook photo groups here:
• Celebrating Senior Shutterbugs
• Digital Photo Academy Community
And don’t forget to check out our main social pages for stunning photography.
Main Pages:

Copyright (C) 2024 Digital Photo Academy. All rights reserved.