Fall Foliage, 1 of 3
| Fall Foliage Photo Pointers: Part 1 of 3 by Russ Burden |
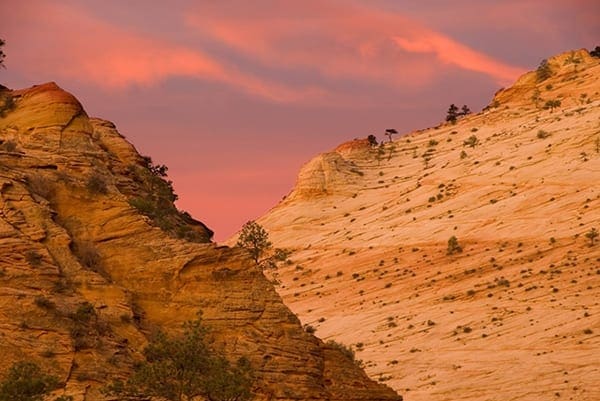
Autumn is my favorite time of year. This holds true for both photography and life in general. The hazy days of summer give way to crisp fall mornings, the landscape is painted with a mosaic of warm toned leaves, the morning air has a fresh clean fragrance, and a rejuvenation of the environment takes place. For the photographer who loves color, it’s a magical time. From the grand landscape to a lonely fallen red leaf to a child romping in a pile of freshly raked leaves, there’s a plethora of subject matter. Whether your passion lies in photographing nature, people, photo journalism, sports, etc., adding a background of fall color will make your images pop. There are so many tips about taking fall photos which I can share that I’m dedicating the entire month of September’s weekly Tips to the subject. If you’re a regular reader of my Photo Tips and Techniques on Take Great Pictures, you may recall I’ve written a few series in the past. So for this week in addition to the next three, I will take you on a journey showing you how to improve your autumn photographs. Save or bookmark them and when the final installment is complete, you’ll have many tips to help you with your fall image making. Better yet, join me on one of my autumn nature photography tours so I can show you first hand my tips, tricks, and techniques – see last paragraph for info.
The Powerful Polarizer: When heading out to photograph fall color, if I had room for but one filter in my camera bag, it would be the polarizer. It’s my workhorse. I use it to saturate an autumn blue sky, render cumulous clouds more prominently, and remove glare from leaves that robs them of their saturation. Depending on the angle of the sun, the leaves reflect its light. The polarizer helps remove this reflection and allows their colors to shine through. In order for a polarizer to have its greatest impact, the camera should be pointed at a subject 90 degrees from the position of the sun. At this position, the sky will be recorded its deepest possible blue. Be careful not to over-polarize making the sky unnaturally dark. Additionally, be careful when using wide angle lenses in that some sections of the sky may be darker than others. This is because the polarization trails off as you deviate from the 90 degrees and the field of view surpasses what can be rendered evenly.

Post Process in Photoshop: Digital photography makes it possible to capture a great shot that would otherwise not work if it was taken on film. The accompanying image of the black bear is a testament to this statement. Had I still been shooting slide film when I encountered the sow eating hawthorne berries in the middle of the day, I wouldn’t have stopped to take pictures knowing that the severe contrast of the light combined with a dark bear would net a poor photo. Knowing that Photoshop could help me rescue the digital file, I, along with approximately 75 other photographers 3 rows deep, kept firing away. To bring the file to a presentable state, I first applied a Shadow/Highlights adjustment. This feature is found under the Image > Adjustments menu. The default settings in the Shadows box are a bit aggressive so I suggest you slide the shadow Amount and Tonal Width arrows to the left. The dark area to the left of the bear’s head was drastically improved after applying this adjustment. In the highlights box, slide the Amount arrow to the right to darken them. I did this to help tone down the bright highlights on the leaves. The other key post processing step was to further reduce the glare on the leaves by painting over a wash of color. I sampled some of the reds and yellows using the eyedropper tool to match the tonality and then used the paintbrush tool at 20% opacity to help remove the shine. It took awhile to do this, but in the end, it made for a memorable image of the experience.

The Reflection: Fall foliage and reflections work well together in that you can essentially double the amount of color in each photo depending on how much of a reflection you include in the composition. Still water in the AM, glass buildings, and a shiny car are just a few ideas of surfaces that can be implemented. Still morning water is great to use as a nature theme, office buildings that reflect a classic red maple is great to include in a cityscape, and a car, it’s hubcap or even chrome bumper can work miracles to create an abstract of fall color mirroring the surface. If water is the chosen surface, use a graduated neutral density filter to even out the exposure between the reflection and the actual subject. The reflection can often be rendered too dark. The graduated filter will help neutralize the discrepancy of the exposure.

To learn more about this topic, join me on one of my Photographic Nature Tours. Visit www.russburdenphotography.com and click on the NATURE TOURS button for more information. Also, pick up a copy of my book, Amphoto’s Complete Book of Photography. You can purchase a signed copy directly from me or visit your local book store or Amazon. Contact me at rburden@ecentral.com to order your signed copy.

