When the Sun Sets
Although no longer in its infancy, the world of digital photography continues to amaze me. So many new doors have opened and many more await the photographer with a new creative key. One of the doors through which I’ve found a portal and continue to open wider with each shoot finds me remaining in the field for longer periods once the sun goes down. Once the sun goes down, those who are patient stand the chance of being justly rewarded with magically lit subjects many photographers overlook. Does the mass exodus just after the sun sets stem from the days of shooting film? I’m not sure what the answer is, but give post sunset a chance to see if you become a convert.

The Essentials: Long exposures demand the use of a tripod. The sturdier the better should the wind decide to not cooperate. If the wind is constant, during the course of the exposure, a flimsy tripod will reveal its short comings in the form of a soft image. Exposures may be as long as thirty seconds so be sure to set your camera to Long Exposure Noise Reduction. During a long exposure the digital sensor builds up heat which translates to digital noise. With the camera set the camera to LENR, the file undergoes “in camera processing” negating the effect of the digital noise. The drawback is it takes time for the processing to occur – an initial 30 second exposure requires 30 seconds of processing time.
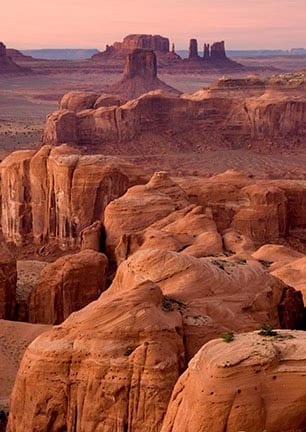
The Glow or the Silhouette? Regardless of the ambient light’s intensity, my trademark slogan is, “It’s All About The LIght.” For post sunset shooting, it’s no different. Ideally, the best light is from a gorgeous alpenglow. Two primary options await the eager photographer – go behind the subject with the bright sky as a backdrop to create a silhouette or use the bounce light of the alpenglow to bathe the subject in the reflected warm tones from the sky. If the subject is small and can be maneuvered around easily, work quickly to go home with both scenarios.

Shoot In RAW: RAW capture provides a photographer with the option to more effectively alter the color balance. It also allows more tweaking of the exposure if needed. In that obtaining a proper exposure may be tricky, more detail can be recovered from a RAW file than a jpg.
Work the Polarizer: on one of my post sunset shoots, I experimented with my polarizer to see what its effect would be even though the sun had set. To my amazement, as long as I adhered to the 90 degrees from the sun rule, the polarizer worked equally as well to darken the sky as if the sun was shining brightly. While it will have no effect if you’re opting for a silhouetted subject shot 180 degrees from the sun, it still works its wonders at right angles.
Low ISO: While it may seem logical to boost the ISO because it’s dark, don’t. Keep the camera set to a low ISO and let the shutter stay open for longer periods of time. The lower the ISO, the lower the noise. You may even wind up with a bonus special effect of moving clouds or moody flowing water. Monitor your histogram after every exposure and adjust the time accordingly. The highlights shouldn’t be a problem, but be careful to not block up the shadows.

