June 2025, Cellphone Photo Editing

June 2025, Cellphone Photo Editing
News about happenings at Deliberate Light and photography instruction (see Digital Photo Academy). My views on this month’s photography topic: Cellphone Photo Editing. To get these newsletters by email a month before they are posted here, go to the DeliberateLight.com website and click on Newsletter Signup.
NEWS
Upcoming Workshops. I am scheduled to teach workshops for Digital Photo Academy on July 5th at Philadelphia 30th Street Station. You can sign up here if interested.
· Mastering Your Camera Controls (1.5 hours) – intended for DSLR/Mirrorless/Compact cameras (smartphone tutorial available separately)
· Composition in the Field (3 hours) – walking tour around the venue with instruction and hands-on practice composing photos (bring any camera)
New Photo.
A Graceful Entrance. On the front porch, the quiet shadows and soft sunlight offer welcome. The front door is tucked in to the right, after you climb the short stairs from the left to the porch, the twin arches gently pulling you in. The soft lines relax you. You have to decide if you want to sit on the porch or seek entry to the house. Why not both? Homes in Rose Valley designed by the architect, William L. Price, have that effect.
(Rose Valley, PA, 2023)
For a more detailed, enlarged view and to get it printed, see it on my website.

VIEWS
Cellphone Photo Editing
Ever wish that your cellphone photos had a little more pop or that you could get the orientation of things just right? Assuming you are paying attention to composition when taking pictures (see my newsletters for pointers), you should do your best when taking a picture, but you might wish it could be improved a little.
There is nothing wrong with photo editing to improve your images. Some things cannot be fixed: if you cut off part of somebody’s face at the edge of the photo, nothing will get it back in. But you can often make noticeable improvements with pretty simple editing and without dramatic changes.
People commonly complain about two things with their cellphone photos: the tonality (brightness/darkness) of an image is unsatisfactory or it needs to be straightened. These are easy fixes, and you should not hesitate to use them.
Because either Google Photos or iPhone Photos is available by default on the vast majority of cellphones, I will limit this little tutorial to them. Even if your cellphone has a different default than either of these, Google Photos can always be installed for free on any Android-or iOS-based cellphone.
It is easy to start editing a photo: open a photo and you should see Edit on the screen as an option. It is the same in both Google and iPhone Photos.
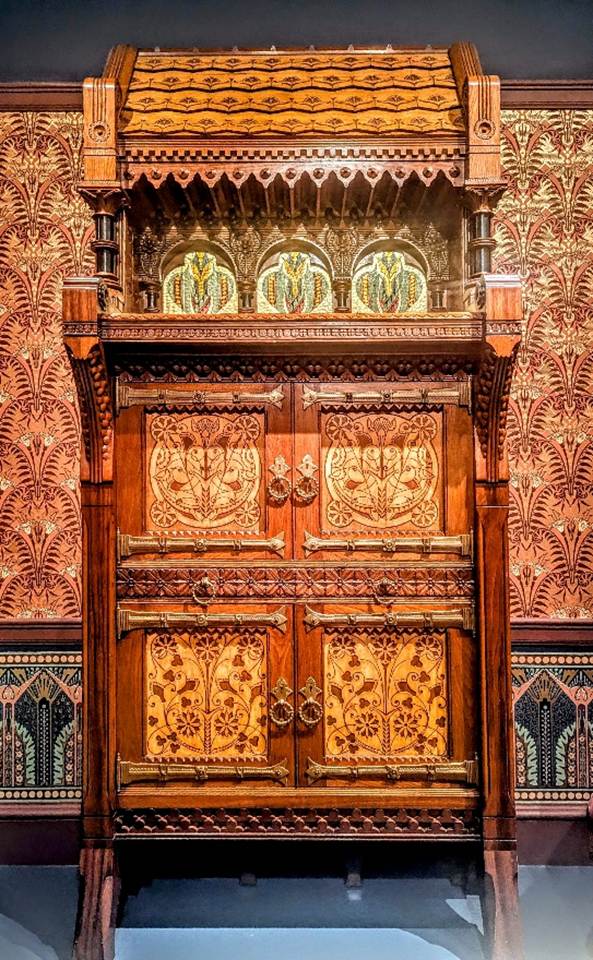
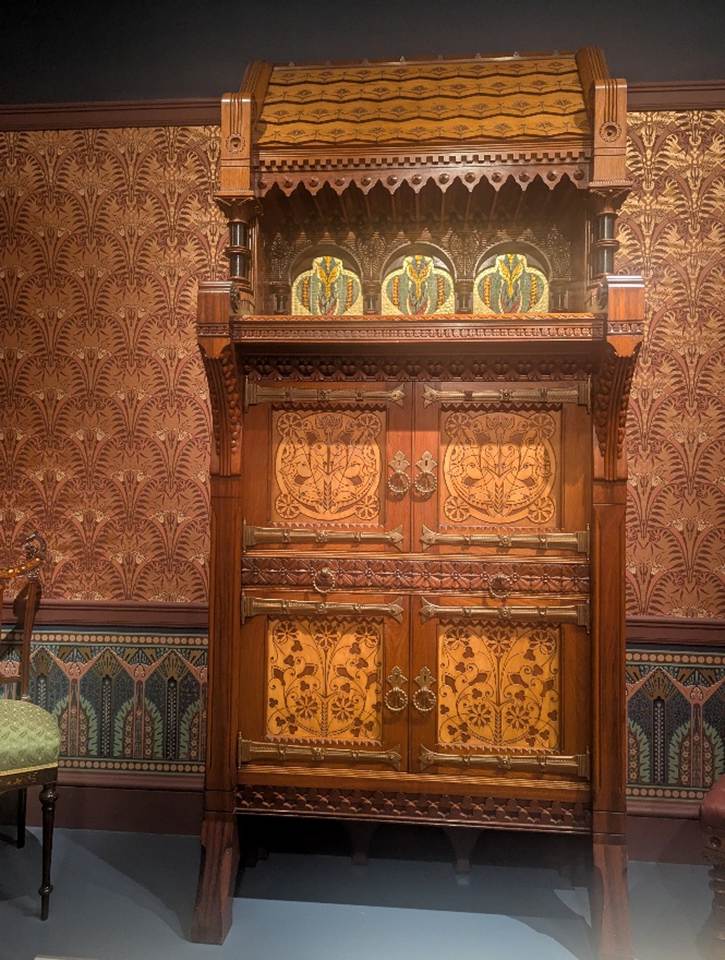
To illustrate, I will use this photo I shot with my cellphone of a cabinet in the Metropolitan Museum of Art in New York designed by Frank Furness (a very influential architect in Philadelphia in the late 19th century, not known for his furniture design skills, but there it is).

I included part of a chair that I did not really want in the picture. Also, for reasons, I could not shoot the cabinet straight on, so in the picture, it is a little tilted and skewed with the left side appearing shorter than the right side because of perspective distortion. I recommend that you start with these kinds of “straightening” edits before proceeding to others.
With this image open, I tap Edit, and a string of edit actions appears in a row below the image.
– In Google Photos, these are things like Crop, Tools, Adjust, etc. (and maybe Suggestions, which is an automatic tonality adjuster).
– In iPhone Photos, the 3 edit actions are Adjust, Filter, Crop.
Tapping on an edit action usually shows a set of options associated with that action.
For my photo, I first want to de-skew the vertical and horizontal edges of the cabinet, so I tap on Crop.
– In Google Photos, I tap Transform to begin the straightening process. By dragging the dots at the corners of the cropping rectangle, I align the edges of the cabinet with the edges of the frame.
– In iPhone Photos, I tap some combination of or
or
and drag the slider to adjust tilt, vertical and horizontal skews, respectively.
Either way, when finished, I tap Done and I get a de-skewed photo like this.

I crop in on the left to eliminate the chair part and to balance the image: from the Edit screen, tap Crop and slide the left edge in using the little handles at the image corners.

The image has a slightly hazy cast and I would like it to have more pop. So, from the Edit screen, I tap Adjust and then Contrast, Warmth, and Pop (Google)/Definition (iPhone). You can play with any of the many adjustments available. For all three, I adjust using the slider and tap Done when finished.

I do one last de-skewing to tweak so the bottom edge is parallel to the bottom of the cabinet.
Here is the final, with the original next to it for comparison. The change is not a huge one, but the improvement is noticeable. Not to your taste? Now you can change it if you want.
Carl Finkbeiner
Mobile: 610-551-3349 website instagram facebook linkedin digitalphotoacademy
