August 2025, Blurring and Depth of Field

August 2025, Blurring and Depth of Field
News about happenings at Deliberate Light and photography instruction (see Digital Photo Academy). My views on this month’s photography topic: Blurring and Depth of Field.
NEWS
Upcoming Workshops. I am next scheduled to teach workshops for Digital Photo Academy on October 4th at Rittenhouse Square in Philadelphia. You can sign up here if interested.
- Mastering Your Camera Controls (1.5 hours) – intended for DSLR/Mirrorless/Compact cameras (smartphone tutorial available separately)
- Composition in the Field (3 hours) – walking tour around the venue with instruction and hands-on practice composing photos (bring any camera)
An Old Photo (redux).
Leaves in Spider Silk. Because of the mid-summer rain, everything was that soft rich green that emerges from wetness. A backdrop for these four leaves caught in spider silk in a small twisted tree, spinning gracefully in the breeze.
(Kennett Square, PA, 2020)
For a more detailed, enlarged view and to get it printed, see it on my website.

VIEWS
Blurring and Depth of FIeld
I have talked about using focused blurring in photos to direct the viewers attention and perhaps to just create special effects. In this newsletter, I will get into some details of how to accomplish it after discussing the more visually interesting question of what difference it makes. But first, what is depth of field?
Roughly speaking, it is the part of an image that is clear and in-focus with other parts being blurred and out-of-focus. More precisely, the “field” is all distances from the camera that are in-focus, with closer and farther distances being blurred. Think of the “field” as an in-focus layer some distance from the camera with everything in front of or behind that layer being out-of-focus. The “depth of field” is the depth in inches or feet of that layer. (In fact, the layer is not sharply bounded at the “front” and “back”, but rather there is a smooth gradation at those boundaries, but visually, the boundaries are usually clear.)
What difference does it make?
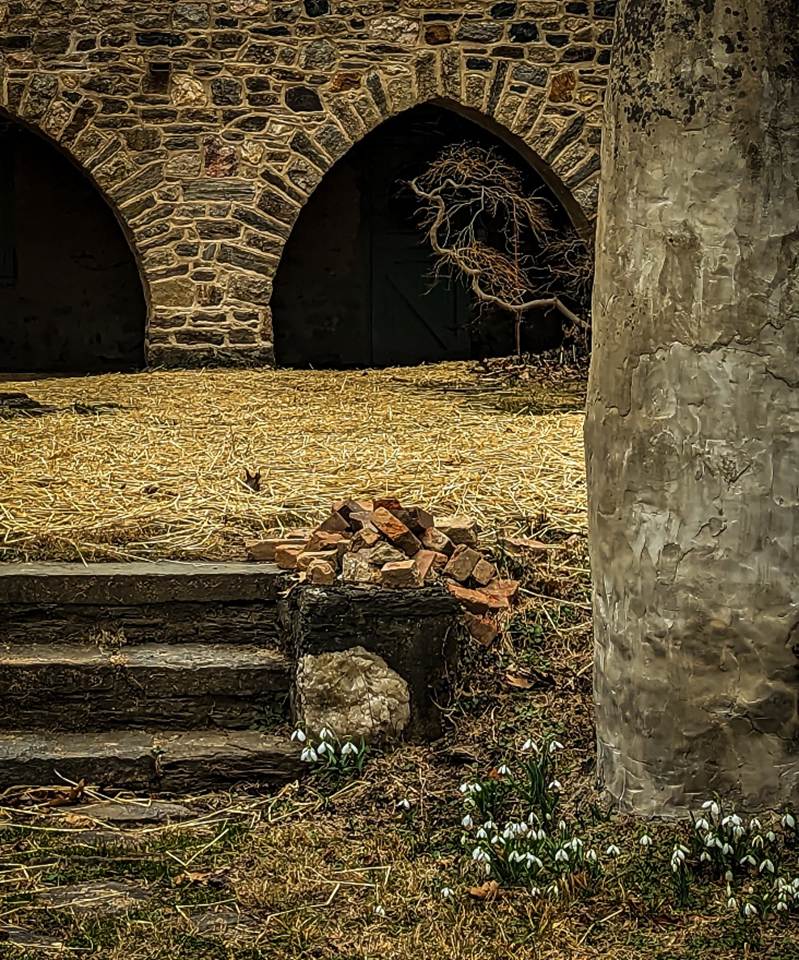
Why might you want to create depth of field blur? The effect of the in-focus field vs. the out-of-focus parts is to direct the eye of the viewer to those things that are in the field, i.e., in-focus. To illustrate, I use this photo which has some things “close” to the viewer (like the flowers, column and steps), some things farther away (the stone walls with gothic arches and the tree branch), and some things in between (the straw on the ground).

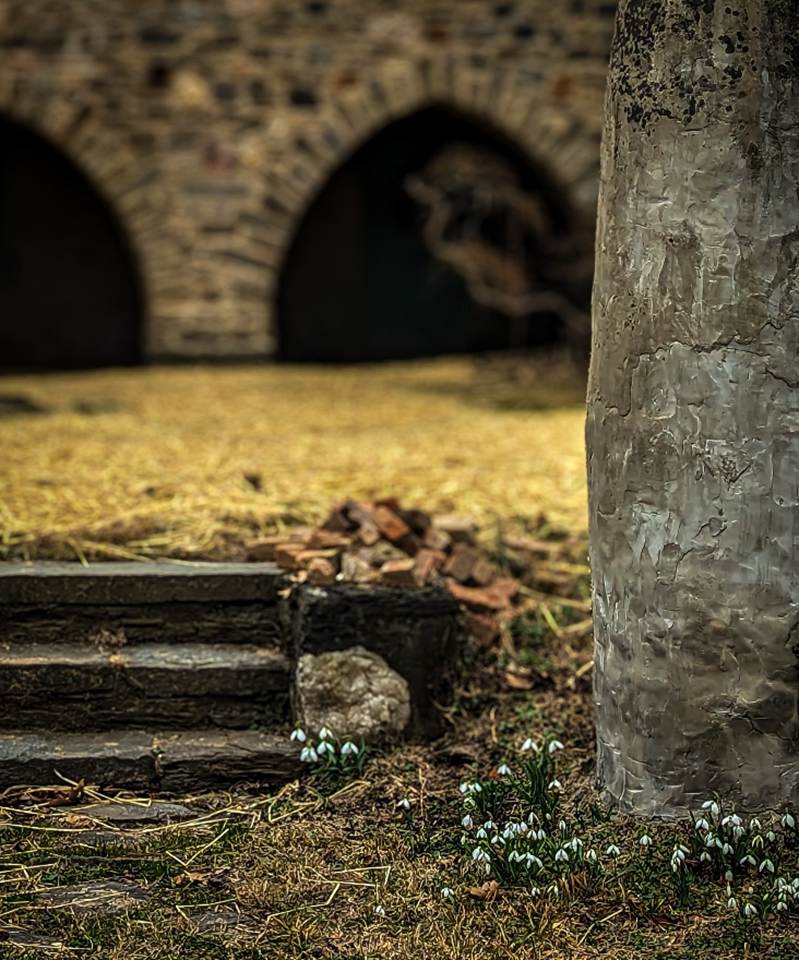
Setting the focus on the flowers and using the appropriate controls might yield the following image, with the flowers and column in-focus. This image is about the flowers and adjacent things like the stone column and steps. The blurred part is an implicit signal to you that everything else is less important.

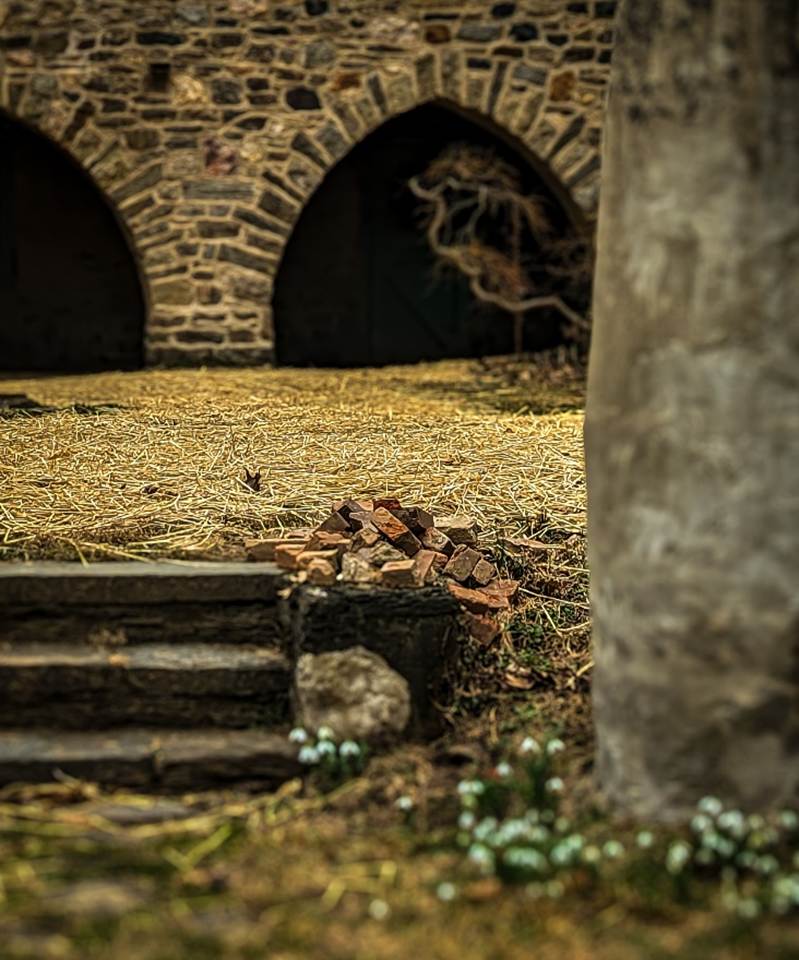
If I move the “field” to the middle distance, so the straw is in-focus, and now the signal is perhaps that the image is about texture.

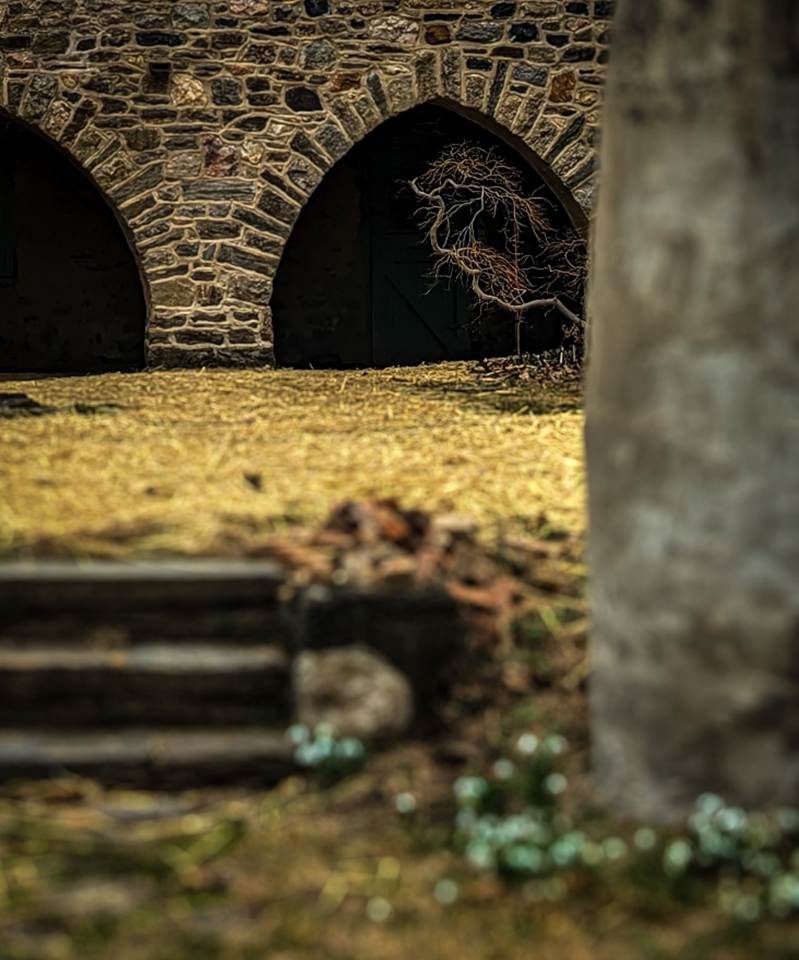
Finally, moving the “field” to the far distance brings the eye to the gothic arched stone wall and the tree branch.

My point is that it matters where the in-focus field is. To me, the last one is the most interesting, followed closely by the first one, with the middle-distance focus being largely uninteresting. But feel free to disagree.
How to create and affect depth of field
On cellphones, at least on Android Camera and iPhone Camera, you can get focused blurring using Portrait mode instead of Photo mode: when you start the Camera app, the Portrait option appears immediately to the left of Photo on Android Camera and immediately to the right on iPhone Camera (apparently just to be different?). Once you have taken a photo, view it in the Photos app and you should see blurring in parts of the photo with the “field”, part of the image you focused on, in-focus. To further adjust the amount of blurring, tap Edit: on Android, tap Actions or Tools, then Portrait Blur; on iPhone, tap Portrait. Tap on the part of the image you want to have in-focus and drag the Blur slider back and forth to change the amount of blurring (on iPhone the slider is named Depth Control).
Regular lens cameras, including compact and interchangeable lens cameras, give you a somewhat different control over blurring directly in-camera. The main controls affecting the amount of depth of field blurring are the aperture (f-stop) and lens focal length (in mm), as well as the physical distance of the camera from the subject. If you use:
<![if !supportLists]>- <![endif]>a wide-open aperture (for example, f-value of f5)
<![if !supportLists]>- <![endif]>a long focal length to zoom in to your subject (for example, 100mm+)
<![if !supportLists]>- <![endif]>physically move close to your subject so some part of it is still in-focus (inches or just a few feet away)
… you should see focused blurring in the resulting photo (that is, the subject you focused on being clear and other parts of the image blurred). Conversely if you use a small aperture (e.g., f22), short focal length (e.g., 25mm), or shoot from far away, most if not all of the image will be in-focus.
It is worth knowing that the fundamental difference between cellphone cameras and regular lens cameras regarding depth of field is that cellphones achieve depth of field blurring by software modifying the image, whereas regular lens cameras do so using optical effects on the captured image. Of course, that distinction is itself in the process of becoming blurred as regular lens cameras use software more, while cellphone cameras can be fitted with optical lens accessories.
Carl Finkbeiner
Mobile: 610-551-3349 website instagram facebook linkedin digitalphotoacademy


