Uncategorized
October 2024, Perspective Distortion
NEWS: Upcoming workshops; new photo; get enlarged view; buying options. VIEWS: perspective distortion due to point-of-view: can make things imposing or remote.
July 2024, Berks Photographic Society Photos
NEWS: Upcoming workshops; new photo; get enlarged view; buying options. VIEWS: wide-angle lenses and perspective distortion
News & Views from Deliberate Light (Carl Finkbeiner)
September 2023, Pictures of Pictures Keeping you informed about happenings at Deliberate Light: photos to browse or buy, photography instruction (see also Digital Photo Academy), and services. Also, my thoughts on a photography subject, this month how to take pictures of pictures. NEWS Upcoming Workshops. I am scheduled to teach the following workshops this month. September 16, location: Old City, Philadelphia The area along Market Street between the Delaware River and Independence Mall is the earliest part of Philadelphia settled by William Penn and the Quakers. It is replete with many opportunities for architecture, history and street photography. · Mastering Your Camera Controls (1.5 hours) – DSLR/Mirrorless/Compact cameras (smartphone tutorial available separately) · Composition in the Field (3 hours) – walking tour around the venue with instruction and hands-on practice composing photos (bring any camera) Coming classes on November 18 in Bartram’s Garden, Philadelphia. New Photo. Sculpture Court Drama: we are treated to a glorious sculpture garden metaphorically blossoming with amazing art everywhere we look. On our first visit back since the pandemic, it is like visiting an old friend when we enter this court in the American Wing of the Metropolitan Museum of Art in New York. A visual treat, these three sculptures, among the many there, seem to me to capture the simultaneous feelings of joy and trepidation as we gradually come out of the pandemic shell For a more detailed, enlarged view, see it on my website. VIEWS Tips for Taking Good Pictures of Pictures. Have you ever tried taking a picture of anything framed with glass? Maybe something in a museum or a favorite photo hanging on your wall? Maybe something to sell on eBay? It can be a frustrating experience. You get glare on the glass from any light source facing the wall hanging, in addition to dim but obvious reflections of anything in front of the picture, like you with your camera, for instance. And it is practically impossible to shoot so that the frame is squared up and not keystoning or distorting. Finally, the picture is frequently lit unevenly or shadowed from some nearby object or from the frame itself. It might help if you could remove the picture from the frame and glass, but that is a hassle and sometimes impossible without damaging the frame or the picture. I have spent years photographing all kinds of wall hanging art and, after trying complicated approaches involving light modifiers, lens filters, and photoshopping, I have settled on a very simple approach that is neither complicated nor costly. To illustrate, here is a snapshot of one of my own photos, hanging on my office wall. Ugh. The bright window behind me is an obvious problem and you can dimly see my reflection taking the picture. A few problems with shadows here: the one inside the frame on the right and outside the frame on the left (which could be cropped out). The skew of the frame from perspective distortion makes simple cropping to the picture frame impossible. No amount of photoshopping will fix this photo. Try this. 1. Prop the picture up at an angle. 2. Set up your camera to aim at the angled picture so that the only thing being reflected from the glass into your camera is the ceiling of the room, preferably a plain surface. 3. Set up a light on each side of the picture, aiming at the picture at about a 45 degree angle to it, each light being equally close to the picture but not so close as to reflect in the glass in the camera view. Cover each light with a thin white cloth. 4. Darken the room (you don’t need a blackout) except for the two lights on the picture. 5. Take the picture. Here is a photo of my set up for this shoot in my cluttered office. And here is the resulting picture, unretouched though cropped a little. There is no glare or reflections in the glass. The light is pretty even, though I should have done better if I had angled the side lights to point down more instead of straight ahead. - Use ordinary utility lights as I did or any lights with shades to aim light at the picture and not light the whole room which might reflect odd colors or cast shadows. - Prop the lights on anything that puts them in the right position. - I draped thin cotton dish towels over the lights to diffuse the light and soften shadows. - I used a tripod for my camera to prevent camera-shake. Tripods are useful things, but you could also just put the camera on any solid surface (like a table) instead. I still need to get rid of that keystoning distortion and crop to the frame. I used Lightroom to undistort, but Google Photos (available on both Android and iPhone) can easily do the same thing, and iPhone Photos can do a pretty good approximation most of the time. I also edited the picture with a few tonality (brightness/darkness) adjustments to try to even out the brightness of the image, easily accomplished in just about any photo editing app, including the ones on your smartphone. So, finally, after cropping to the frame edges, here is the finished product. Pretty good. I do a little better in the following image with some, more serious, editing in Lightroom. Compared to the preceding version, we see the black frame and the white mat are now more uniformly black and white, respectively, while at the same time revealing more detail in the subject. The fact remains that the first, more straightforward edit that you can do on a smartphone is still good. Carl Finkbeiner Mobile: 610-551-3349 website instagram facebook linkedin digitalphotoacademy
News & Views from Deliberate Light (Carl Finkbeiner)
August 2023, Great Portrait Photographers Keeping you informed about happenings at Deliberate Light: photos to browse or buy, photography instruction (see also Digital Photo Academy), and services. Also, sometimes my thoughts on a photography subject, this month Great Portrait Photographers. NEWS Upcoming Workshops. I am scheduled to teach the following workshops this month. August 19, location: Manayunk, Philadelphia A pretty old town with a picturesque main street and old canal, as well as photo ops from the walking bridge over the Schuylkill River and from the churches and parks scattered in the residential area on the hillsides along the river. · Mastering Your Camera Controls (1.5 hours) – DSLR/Mirrorless/Compact cameras (smartphone tutorial available separately) · Composition in the Field (3 hours) – walking tour around the venue with instruction and hands-on practice composing photos (bring any camera) Coming classes on September 16 in Old City, Philadelphia The area along Market Street between the Delaware River and Independence Mall is the earliest part of Philadelphia settled by William Penn and the Quakers. It is replete with many opportunities for architecture, history and street photography. New Photo. The soft light and colors, gritty textures, and sensuous lines of Upper Antelope Canyon in Arizona, combined to amaze and delight me, as I walked through it as slowly as possible with my equally astonished wife and brother-in-law, resisting the friendly urging of the Navaho guide to keep moving so other people can experience it as well. It is a place that demands contemplation. I think about the millions of years of flash floods through the caverns as the god of waters shaped the sandstone rock in its own image. For a more detailed, enlarged view, see it on my website. VIEWS Since I discussed a group portrait painting last month, I decided to follow the theme this month and show a few photographs by some of the greatest contemporary portrait photographers. An underlying idea for me regarding portraiture is that while technique is important, and all these photographers are technically brilliant, it is not sufficient for greatness: for that, the face and body language must tell the viewer a story. (As before, to avoid entanglements with copyright infringement, I am providing links to photos for you to enjoy, instead of copying the images themselves.) Richard Avedon (1923 - 2004) Crossing art and commercial lines. Few people have been able to successfully straddle the line between fine art and commercial photography, but Avedon did. Avedon’s fashion photos, where he began his professional career are creative and justly famous, but where he stuns me is in portraiture. Whether photographing mine workers in Colorado or the rich and famous, he was able to uncover the person behind the façade. In his own words, “My photographs don’t go below the surface. I have great faith in surfaces. A good one is full of clues.” The first photo below is a joyfully vibrant photo of a fashion model and the second is a rare hauntingly unguarded photo of one of the most glamorous people of the 20th century. Twiggy - hair by Ara Gallant Paris 1968 MoMA Marilyn Monroe - actress New York 1957 MoMA Nadav Kander (1961 – ) Intensely intentional artist. Best known to the public for his 2016 Time Person of the Year photo of Donald Trump glowering ominously over his shoulder, Kander photographs are always beautifully and carefully lit and composed. He describes his photos as having a “sense of quiet and unease” and says that “nothing should be considered ‘out of bounds’ to my art practice.” His are works of art, not documentation and as such, are often edited to intensify the portrayal. In the Attenborough photo below, we see Kander at his most realistic and even here the lighting and pose perfectly convey the personality of this vitally engaged naturalist. The second photo shows Kander’s adeptness at conveying mystery and drama for a great British actor. David Attenborough – London 2012 Jonathan Price – London 2022 Annie Leibovitz (1949 – ) Great choreographer. Responsible for some of the greatest photographs of Rolling Stone magazine, Leibovitz has also been very active for Vogue and Vanity Fair. Influenced by Avedon (which is apparent), not surprisingly Leibovitz also successfully straddles the art/commercial worlds with photos of pop culture, political, and fashion icons. Leibovitz photos are often carefully set and composed, likely with a great deal of planning ahead of time. In the two links on the first line below, you can see the fun side of her work in the Captain Hook photo for Disney and a BTS shot of the elaborate setup for it. Obviously, Photoshop was involved in the final image. The next photo is probably her most famous portrait, a remarkably intimate study of John and Yoko for a future photo shoot, taken using a Polaroid camera hours before John Lennon was shot to death. Russell Brand as Captain Hook BTS view of Captain Hook John Lennon And Yoko Ono, 1980 Steve McCurry (1950 - present) Photographer of the Human Story. I included McCurry in my newsletter about Great Landscape Photographers, but he is probably better known for his portraits. His most famous photo is that of the Afghan Girl in 1984 showing an angelically beautiful Afghan refugee in Pakistan during the Soviet-Afghan war, fear and hope both evident in her expression. Her story of course, did not end with that photo. Many years later in 2002, McCurry tracked her down again, living in poverty, and photographed her as a worn looking woman from whom hope has departed (sscroll down in the link below), completely unaware of McCurry’s photo and its fame. In subsequent years, she lost her children and husband and became something of a political hot potato between Afghanistan and Pakistan. In 2021, she was airlifted to Italy out of Afghanistan during the U.S. troop pullout, and I have no idea what has become of her since. Sometimes even great photography only begins to scrape the surface. Afghan Girl 1979 Carl Finkbeiner Mobile: 610-551-3349 website instagram facebook linkedin digitalphotoacademy
News & Views from Deliberate Light (Carl Finkbeiner)
News & Views from February 2023, Thoughts on Art As I said last month, I will be sending occasional brief emails about my photography. I am avoiding the marketing approach of flooding your inbox with reminders that frantically repeat “Hey, buy my stuff!!” as though you need multiple reminders every day or you might forget about “my stuff”. I figure once a month or so should be often enough to keep you informed about what is happening on www.DeliberateLight.com without being an annoyance. I also will be providing what I hope will be a welcome offering of a few thoughts and impressions relating to photography and/or to my images. It should not take more than a few minutes to absorb each month, but it is intended to be a little pick-me-up in the middle of your day, evoking your own thoughts and impressions. NEWS If you have not scrutinized my website thoroughly (and why not? 😊), I want to let you know that there are 3 parts to it that you should be able to reach easily from the home page. Of course, many of the Fine Art Gallery photos are of Rose Valley where I live, but there are many others as well. Any of those images can be purchased (click the Buy Photo button) for delivery directly to you in any of many different forms and a very wide range of price points. VIEWS Acknowledging that everyone has a different take on art they like, I personally want to be pulled out of myself by art. I want to feel or think thoughts that are at least a little new and a little uplifting. Have you ever watched an infant learning something new, like how to grip the cat’s tail or how to say “Da”? Often, they giggle at what they experience, as though it tickles something to learn. That is what I seek in art, that simple pleasure in finding a new and different way to see or do things. For example… HUDSON RIVER VALLEY DAWN (Garrison, NY, 2016) The morning was promising to be beautiful and so I was awake and out early during a late fall visit with a dear cousin who lives on a hill overlooking the Hudson River across from West Point. The view that rewarded me almost made me wonder if I was still dreaming, the textures and colors and lines curling through. A gentle mist from the warm air and cool water of the river softened distant details blued by the pre-dawn light, enriching the earthy colors of the fading autumn woods. To this day, when I see this photo, it calms me. It is, perhaps, the most beautiful place in the world. Carl Finkbeiner Mobile: 610-551-3349 website instagram facebook linkedin
SHADOWS AND SILHOUETTES – Jerry Downs
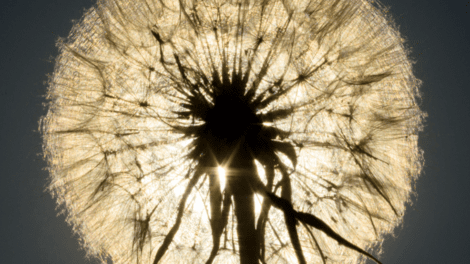
As summer months start, so will dramatic shadows and silhouettes to add more drama and eye-catching interest to your photographs. Let's look at how they make their magic.
