DPA Magazine
Location storage with iPod and iPod Camera Connection
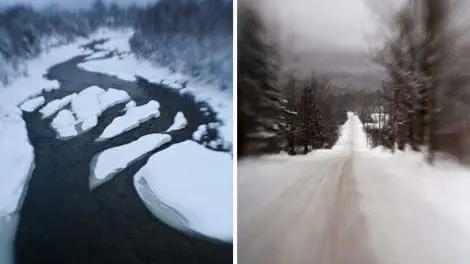
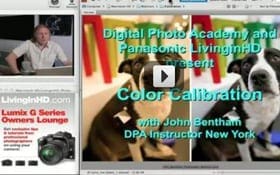
Calibration Webinar Tip - Location storage with iPod and iPod Camera Connection Written by John Bentham, DPA Instructor, New York. Digital Photo Academy and LivinginHD present a free monthly series of photography webinars on LivinginHD.com. Your host, John Bentham answers many questions live during the webinars. Additional questions, answers and tips are posted here on digitalphotoacademy.com where you can also view the archived webinars. Photos by Frank Siteman, DPA Instructor, Boston The location photos here, the snowy landscapes, the brightly colored houses and the seagulls in flight are all shot by Frank Siteman, a DPA instructor in Boston. Frank has many years of shooting on location and is a master of post production processing using NIK and Photoshop. The subtle differences between the snowscapes are intentional effects by Frank to produce specific effects for specific purposes. When I’m looking at Frank’s photos and the color looks different, odd or unusual ... I know it’s not a mistake, Frank really knows what he’s doing when it comes to color. Recently, one of my students, Cindy emailed me with some exciting news. She had been presented an opportunity to travel to India for a number of weeks and was trying to determine what photo equipment to bring and how to store (back-up) her digital images on location. Good, tough questions! Cindy Wrote: Hey! Hope all is well! I have exciting news...I′m going to study abroad in India over winter break! I′m SO psyched! I need advice on what camera equipment to bring. I′d like to pack light because I′m not sure how "secure" where I′ll be staying is...I′ll be there for 3 weeks...any suggestions? I′ll be traveling in south India: Chennai, Madurai, and Bangalore. We′ll be working with a local artist/painter who teaches special ed kids. The end project will be a 5 minute documentary. I never thought a doc could be so short! Anyway, I′M PSYCHED!!! I′ll learn about movie cameras but I′m bringing my own equipment just to shoot personal stuff. Here′s a list of what I have: EOS 50D (and an EOS3 and ancient AE1-P) 28-105mm lens (I don′t think my other film camera lenses can be used with my digital can they?) polarizing filter for 28-105 lens Speedlite 420EX flash (diffuser & stroboframe too) batteries, chargers, card reader, lens cloth etc. 3 - 4GB memory cards IPod touch (only @ 8GB I think) IPod 80GB (virtually all photo space is clear) That′s it! I think I′ll need to buy some equipment! I′ve thought of buying a ton of cards and just downloading everything when I get home...bad idea? Cindy On location you are forced to make sacrifices. At the same time you never want to go without. It’s a tricky balancing act between being well equipped, with a good supply of back-up equipment and being hindered by the weight and size of your gear. If you’re traveling with assistants and have a budget for transporting the additional stuff it’s not really an issue (read extra baggage charges, porter and bell hop tips etc). But those days seem to be gone with ever tightening travel and location budgets being imposed by cost conscious clients. The likely scenario also means photographers are fronting the costs themselves and hoping to recoup expenses later, thus many photographers are learning to travel with less ... Travel lean and mean so to speak. That doesn′t mean you should embark on a job with only one camera and one lens but depending on where you are traveling this is not such a ridiculous concept. With good quality digital cameras being ubiquitous worldwide with the exception of very remote locations, it’s feasible to travel with less equipment – the new game plan being to buy a replacement on location if something goes wrong. Photo by Frank Siteman, DPA Instructor, Boston However the one thing you can’t replace are your images, your digital files. These are often irreplaceable. A former assistant of mine told me recently of his nightmare story of losing many thousands of images following a year long trip to Nepal. He bought a stand alone portable hard drive as a primary storage for his images but neglected to back-up. Admittedly his trip was an extreme duration, one year in Nepal with limited resources and limited power supplies, limited internet and other logistical issues but he really took a risk making his back-up his primary storage and erasing his memory cards. Back-Up is a back-up. You should never trust a single drive (or memory card) to keep secure the only copy of your images. If the shoot (trip duration) is under a couple of days or up to a few weeks you can carry extra memory cards AND back-up to a drive. This way you have two copies of all your photos. For a longer trip with more images I bring a laptop AND a portable hard drive. I download the cards and back-up to the drive before erasing the memory cards. For additional protection I, or my assistant will carry one copy with us and keep one copy in the hotel room (the hotel safe is even better). If you don’t have a laptop, or you cant bring it on location, which is common if you’re doing any long distance heavy duty trekking, climbing or hiking. I personally find it a pain to carry a laptop in addition to all the camera gear even just for a day. There is a solution - Use your iPod as a portable hard drive back-up. For about $30 you can buy a camera connector adapter and upload your dailies (the daily images shot) to your iPod and keep the original images on your memory cards. Thus you have two copies and still maintain low weight storage. Photos by Frank Siteman, DPA Instructor, Boston John Bentham replied: Hi Cindy, sounds like a great trip. I would suggest you leave the film cameras at home. India is very hot and humid and you′ll have problems with film in the climate (speaking from personal experience). Also there is an issue with weight while traveling, keep it as light as possible. If you are worrying about, and helping to carry movie equipment you can’t really lay your own camera down in India, it will go missing fast. I think your 50D with the 28-105 (plus the flash) should be all you need. You wont need the stroboframe either. Most of the film lenses will NOT work with the digital camera but some models will, depends on the lens. Bring the Polarizer. I would suggest 3 camera batteries and make sure you have adapters etc. for the charger. For photo storage (I assume you are not bringing a laptop) Id suggest you buy 3-4 cards of 2-4 GB each but I would also strongly suggest a back up. You can burn to your IPod without erasing your music. When you plug your ipod into the computer check the box that says enable disk use, then it operates just like an external hard drive. You need to buy a iPod camera connector. This will enable you to keep one copy of your images on the cards and have a back up on the iPod. Get a rain cover (www.fotosharp.com). Good Luck, let me know if you have other questions. JB iPod camera connector, $30: http://support.apple.com/kb/TA38187?viewlocale=en_US How to use the iPod Camera Connector: support.apple.com. The iPod Camera Connector is only for use with the iPod photo, iPod with color display, and Fifth Generation iPod Camera rain cover: Get yourself a great camera rain cover which is very useful in India and other humid locations: www.fotosharp.com Spyder Cube: For Color Calibration on location, shooting either jpeg files or RAW files I recommend the Spyder Cube. Its a sturdy, light and relatively small color calibration target. As the name suggests the cube is 3-dimensional which is very useful for photographing in real world (read location) situations which varying intensities, direction and color temperature of light sources. I’ve got one on my key chain thus it’s always handy when needed. You can see the Spyder Cube in action on the dogs collar in the before and after color correction images below. The original image on the left shows an incorrect color balance the using Auto White Balance and shooting jpeg images processed in camera. The corrected color image on the right is the result of digital processing using the Spyder Cube as a color patch and processing the jpeg through Camera Raw processing. A simple click (eyedropper tool) on the Cube corrects the color balance for the image. Photos by John Bentham, DPA Instructor, New York Camera Care on Location: See this DPA tip on camera care on location: http://www.digitalphotoacademy.com/Home/UserArticleCategories/UserArticles/details/params/object/18169/default.aspx Webinar Submission Specs: All DPA students can submit photographs for inclusion in the Digital Photo Academy, LiHD Webinar, Online Photo Class Series. If you would like to submit your photographs for an upcoming webinar, read the following. Each webinar has a specific theme or topic. You can see the date and topic of the next webinar at LivinginHD.com, Tip of the Day, Online Photo Class. Note that webinars are edited and formatted days in advance, thus please submit your photos at least a week in advance of the webinar, late submissions can not be added. Photographs are chosen, and edited, for their applicability to the webinar theme, artistic and technical merit, and content length. If your photograph is NOT chosen, it will be archived and may appear in a more appropriate future webinar. Submit your photographs to [email protected] By submitting your photographs for consideration, you grant and authorize, The Digital Photo Academy, LivinginHD.com and Panasonic, the following rights: The right to use your photographs in the content and promotion of the webinar series, and for use on each company’s respective website. You further authorize your photographs may be archived online and/or in a database, and allow unrestricted internet availability of any webinars containing your photographs. You further authorize the use of your photographs in any future webinars. By voluntarily submitting your photographs for consideration you agree to the aforementioned without any legal claims, or claims for remuneration, whatsoever. You, as the photographer, retain the copyright © of any submitted photographs. The aforementioned companies will make best possible efforts to apply proper photo credit and acknowledgement with your photograph whenever possible and practical.
Color Temperature, Balancing for Different Light Sources
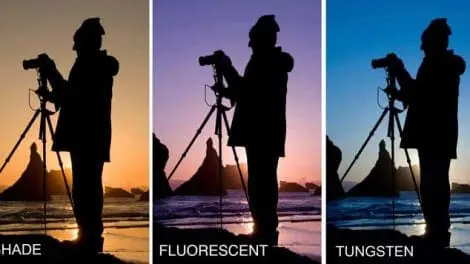
Digital Photo Academy and LivinginHD present a free monthly series of photography webinars on LivinginHD.com. Your host, John Bentham answers many questions live during the webinars. On January 11, 2011 DPA and LiHD presented a Webinar on Color Calibration co-hosted by Josh Fischer, the Sales and Education Manager at Datacolor, Spyder (datacolor.com). Josh demystified color calibration and tackled the technical questions specific to Spyder products. As John is keen to point out, Josh kept him out of trouble with regard to color calibration. Additional questions, answers and tips are posted here on digitalphotoacademy.com where you can also view the archived webinars. Photo by Russ Burden, DPA instructor Denver Color temperature in degrees Kelvin. The Kelvin scale measures color temperature in wavelength of light, much like Fahrenheit or Celsius measure temperature. We typically associate heat (warmth) with high temperatures. Thus the Kelvin scale is somewhat counter intuitive to F or C in that the higher the temperature in Kelvin the cooler the color appears. Photos by Russ Burden, DPA instructor Denver showing the effects different White Balance settings would produce. Your digital camera, either a Point and Shoot or DSLR has Color Correction (White Balance Settings) built into the camera’s processing system. By selecting the correct White Balance for the specific light source, you are on your way to getting better color balance in your photographs. Most cameras come from the manufacturer set to a default white balance of AWB (Auto White Balance). This does a pretty good job of rendering color in many situations. When you run into difficulties you will get better results if you take the camera off Auto White Balance and choose a specific white balance seeing for each shooting situation. The image above shows the White Balance menu on the display of a Panasonic GF1. By toggling the White Balance up or down the photographer can choose between a number of white balance options and pre-set WB filters. As outlined in the Light Source Color Temperature list below White Balance settings will vary depending on the manufacturer and specific model of your camera. Many of the settings are similar, if not identical but may have different names. A WB setting of Tungsten (named so because of the tungsten filament in the bulb itself), will in some cameras be referred to as Incandescent or Halogen. They are basically the same setting. Many cameras have multiple setting for Fluorescent bulbs as many different types of FL tubes are manufactured to produce many different color temperatures. Often cameras will have multiple settings for Fluorescent 1, Fluorescent 2 etc. You need to determine through trial and error which FL setting is best for the particular lights you are shooting under. Daylight is sometimes referred to as Sunlight or a Good Weather setting. The image below shows the various White Balance settings available on a Panasonic GF1. Notice the two settings White Set 1 and White Set 2. These are custom pre-set settings which enable you to record a custom corrected white balance to specific lighting conditions if the standard WB filters don’t give you a corrected color. The Color Temperature allows you to manually dial up or down the actual color temperature for a very accurate adjustment of color. Light Source: Color temperature in degrees Kelvin Cooler Colors (Blue) Skylight (blue sky) 12,000 - 20,000 Average summer shade 8000 Light summer shade 7100 Typical summer light (sun + sky) 6500 Daylight fluorescent 6300 Xenon short-arc 6400 Overcast sky 6000 Clear mercury lamp 5900 Sunlight (noon, summer, mid-latitudes) 5400 Design white fluorescent 5200 Daylight photoflood 4800 - 5000 Sunlight (early morning and late afternoon) 4300 Brite White Deluxe Mercury lamp 4000 Sunlight (1 hour after dawn) 3500 Cool white fluorescent 3400 Photoflood 3400 Professional tungsten photographic lights 3200 100-watt tungsten halogen 3000 Deluxe Warm White fluorescent 2950 100-watt incandescent 2870 40-watt incandescent 2500 High-pressure sodium light 2100 Sunlight (sunrise or sunset) 2000 Candle flame 1850 - 1900 Match flame 1700 Warmer Colors (Red) Color temperature in RAW format: For additional information see Russ Burden’s (DPA Denver) tip on color temperature when shooting in RAW format: http://www.digitalphotoacademy.com/Home/UserArticleCategories/UserArticles/details/params/object/6465/default.aspx Camera Charts: The chart below shows the camera menu Icons for Panasonic cameras. Other manufacturers Icon Charts are available for free download on DPA. These can be helpful in determining what specific icons represent on your specific camera. Download these here: http://www.digitalphotoacademy.com/Home/Articles/Details/params/object/4478/menu/99/default.aspx Webinar Submission Specs: All DPA students can submit photographs for inclusion in the Digital Photo Academy, LiHD Webinar, Online Photo Class Series. If you would like to submit your photographs for an upcoming webinar, read the following. Each webinar has a specific theme or topic. You can see the date and topic of the next webinar at LivinginHD.com, Tip of the Day, Online Photo Class. Note that webinars are edited and formatted days in advance, thus please submit your photos at least a week in advance of the webinar, late submissions can not be added. Photographs are chosen, and edited, for their applicability to the webinar theme, artistic and technical merit, and content length. If your photograph is NOT chosen, it will be archived and may appear in a more appropriate future webinar. Submit your photographs to [email protected] By submitting your photographs for consideration, you grant and authorize, The Digital Photo Academy, LivinginHD.com and Panasonic, the following rights: The right to use your photographs in the content and promotion of the webinar series, and for use on each company’s respective website. You further authorize your photographs may be archived online and/or in a database, and allow unrestricted internet availability of any webinars containing your photographs. You further authorize the use of your photographs in any future webinars. By voluntarily submitting your photographs for consideration you agree to the aforementioned without any legal claims, or claims for remuneration, whatsoever. You, as the photographer, retain the copyright © of any submitted photographs. The aforementioned companies will make best possible efforts to apply proper photo credit and acknowledgement with your photograph whenever possible and practical.
Shooting in Extreme Lighting Conditions, Bright Sun and Very Low Light ISO Expansion, ND (Neutral Density) and Polarizing Filters
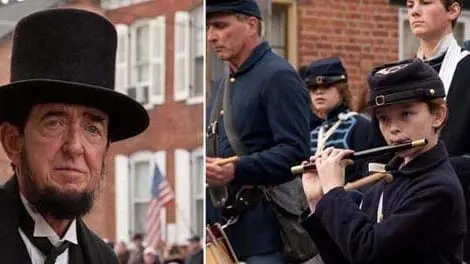
Father Dan, a DPA student of both Hinda Schuman and Rick Wright in Philadelphia sent the following inquiry prior to shooting the annual Gettysburg Remembrance Parade. His concerns were shooting in very bright sunlight and shooting flags and candles at night. Father Dan also has some helpful advice for other students which I thought worth sharing. See his comments about attacking your subject and some of his photos below. John, I will visiting Gettysburg this weekend for the annual Remembrance Day Parade - from where I got the photo I call "flag boy" which you showed on the WEBinar and should have received a copy along with the Little Round Top B&W photo. I will probably stand in the same spot as last year. I hope to get some different angles and I want to "attack my subjects" more. Last year I stood back from the action but I know the best photos are when, like a tennis player who "rushes the net", the photographer needs to gets close to the subject. I suspect it will be a sunny day and I purchased a Number 4 ND filter. I am not sure if the number 4 ND is too dark? I do have a NC (Neutral Clear) filter which works well in most circumstances. At night, after the parade, the soldiers cemetery tombstones are lit with 3000 luminaries beside small 12 inch flags of their states and regiments. My brother is after me to get the perfect shot. I am bringing a tripod and a cable shutter release. If you have any suggestions about how to get the shot I will appreciate a few words. A problem is that in the background there are many people walking about the grave-sites so leaving the shutter open may be good for the foreground but not the background. My best good light lens is a 50 mm F 1.8 lens. My other lens is F3.5. My camera is a full frame (35 mm) sensor. Thanks, Father Dan Photo by Father Dan McLaughlin, DPA student Philadelphia Johns reply, RE: Menu ISO Expansion Father Dan, Sounds like you have most of the issues thought out. I don’t know that youll need the ND filter. If it really is much too bright you could lower your ISO all the way. On your camera turn on ISO expansion (probably in custom settings), at the low setting it will go down to 100 ISO, instead of the factory default 200, and stop down the aperture to f11 - 16. You should be fine during the bright sun. Unless you are trying to limit depth of field in which case the ND will help, the problem being then its difficult to see through the camera. I usually use a Polarizing filter during the day instead of an ND, but the effect is similar. At night with ISO expansion turned on, you can go up to 25,600 ISO however at the cost of digital noise, a trade off. I would limit myself to 6400 max. If you begin to see the effects of Digital Noise at the higher ISO ratings you can turn to NIK Dfine noise reduction software in post production for a quick painless cure. The tripod is a good idea. If you stop the lens aperture down (f8-11) you can dial in such a long shutter speed, approx 30 sec – 2 min, (youll have to experiment here), you can make any moving people disappear altogether, could be an interesting effect. Photo by Father Dan McLaughlin, DPA student Philadelphia See more of Father Dans photos here: http://gallery.me.com/frdmcl#101038&bgcolor=black&view=grid Also check out the following night, tripod and exposure tips: http://www.digitalphotoacademy.com/Home/UserArticleCategories/UserArticles/details/params/object/18198/default.aspx http://www.digitalphotoacademy.com/Home/UserArticleCategories/UserArticles/details/params/object/13830/default.aspx http://www.digitalphotoacademy.com/Home/UserArticleCategories/UserArticles/details/params/object/13836/default.aspx http://www.digitalphotoacademy.com/Home/UserArticleCategories/UserArticles/details/params/object/15027/default.aspx http://www.digitalphotoacademy.com/Home/UserArticleCategories/UserArticles/details/params/object/18170/default.aspx http://www.digitalphotoacademy.com/Home/UserArticleCategories/UserArticles/details/params/object/18170/default.aspx
Buying a Laptop VS Desktop; Laptops in the Field; Image Back-Up
With any Laptop the considerations are size, weight, speed, memory and cost. A smaller screen and slower processor with less RAM will significantly reduce the cost but then it’s difficult to use as a primary computer. A small computer screen is really only useful as a carry around reference on location type of computer. Unfortunately one computer, much like any one camera, does not do everything. You need to weigh cost and size against portability etc.
Chromotherapy
I recently came across an intriguing word I never encountered - chromotherapy. It dates back to ancient European and Asian culture and uses color to heal. It’s still used today in alternative medicine. In that color is such an integral part of photography, the word piqued my curiosity. © Russ Burden Already knowing that specific colors convey specific psychological feelings and evoke certain moods, it made me think more deeply about the relationship. While I’m not convinced that looking at a given color will rid myself of a headache, there are givens when it comes to the psychology of color and how it impacts the way a viewer perceives an image. Therefore it’s beneficial that you, as a photographer, learn its psychological impact to help convey a mood in a photograph. Orange: Fun / Energy - Orange tends to stimulate activity and one’s appetite. It also connotes a feeling of change - think fall color. If its hue leans more toward the red side, it creates excitement. If it leans more toward the yellow, it’s more tranquil.
DPA Webinars, Lighting Against a White Background, How to clean it up with NIK
Digital Photo Academy and LivinginHD present a free monthly series of photography webinars on LivinginHD.com. Your host, John Bentham answers many questions live during the webinars. Additional questions, answers and tips are posted here on digitalphotoacademy.com where you can also view the archived webinars. Photo by John Bentham, DPA instructor, New York Top Image – Original Bottom Image – NIK Processed Looking for a quick, painless and fast way to add some punch to your portraits? Who isn’t? The samples on this page started out as portraits shot against a white background. Shot with relatively simple lighting, one or two flash heads off camera to produce directional light. The trouble with shooting against white is there is often a bit of background flare to contend with. Flare is light that bounces back off the background to come back into the lens. The result can be washed out and muted colors in your subject. To avoid this photographers often struggle with the lighting to achieve just the right balance between light on the subject, not too much to produce flare, and yet still maintain a clean white background. Easier said than done. Sometimes there isn’t enough time on a shoot, depending on the subject and situation to tweak it just right. This is where NIK Viveza 2 Software comes in. Photo by John Digilio, DPA student, New York Left Image – Original Right Image – NIK Processed In a simple fix you simply open the image in Photoshop (or Lightroom) and click Viveza 2 Plug-In. Once the program opens you adjust a few sliders to make a Global adjustment, adding some Structure, Contrast, Saturation. Boom ... You’re done, what could be easier and the results look great. Photo by John Bentham, DPA instructor, New York Left Image – Original Right Image – NIK Processed
Marketing your Images, Websites, Business Cards and Postcards
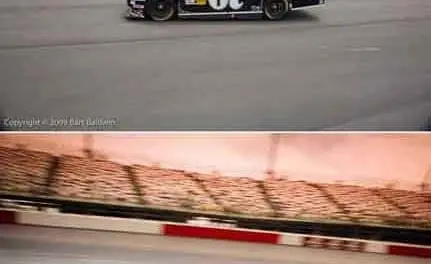
Digital Photo Academy and LivinginHD present a free monthly series of photography webinars on LivinginHD.com. Your host, John Bentham answers many questions live during the webinars. Additional questions, answers and tips are posted here on digitalphotoacademy.com where you can also view the archived webinars. Thinking about selling your prints on-line? Today there are many resources to enable and facilitate this. One option is to launch your own web site and market prints directly from your own self managed web venue. A potential way to earn extra money from something you enjoy and already do. New York DPA student Brett Whysel has done exactly this and makes additional income from selling his beautiful Black and White bridge prints to collectors while also donating a portion of proceeds to charity. Visit: http://whysel.smugmug.com/ Photo by Bart Baldwin, DPA Instructor, Charlotte, NC The great Nascar images above by DPA instructor Bart Baldwin, based in Charlotte, NC are stunning images of great popularity that generate vast interest that could easily be marketed to race fans, automotive companies, auto shops, magazines and calendar printers. With a little help from post production software as seen in the before and after images provided by Bart the dynamic feel of being at the track, in the pits really comes forth. People who love race cars want to get this close to the cars, if fans can’t get a pit pass it’s up to the photographer to get them closer. Marketing your images to postcard, greeting card companies and outlets: There are a number of sites that cater to photographers and illustrators, or fine artists that provide a forum or outlet for independent artists to sell their work as reproductions on-line. I am a member of Fine Art America but I don’t sell prints through them. I joined up to promote some events, galley shows and a Tribeca Arts Festival I was exhibiting in. I don’t think its a bad idea for making money. It may be a bad idea for being taken seriously as an artist in some circles, primarily the art gallery market. If your prints or drawing were available on one of these site it could undermine your credibility in the Art Gallery market. But if you′re not really in that market (IE with gallery representation) maybe it doesn′t matter. And in some cases photographers have been “discovered” on Flickr and similar sites. Who knows, the mass market and greeting card thing worked for William Wegman. He started out as an fine art photographer in the 1970s, now he’s a very successful photographer primarily thought good marketing and vast merchandising (cards calendars etc). If you don’t recognize the name William Wegman, you will surely recognize his ubiquitous images of lanky, svelte weimaraner hound dogs in comical very-people-like poses and situations. Photo by Bart Baldwin, DPA Instructor, Charlotte, NC As with any venture, where people are licensing your images I would caution you check the fine print with regard to copyright and reproduction rights etc. Make sure you as the photographer own and retain the copyright and reproduction rights. Just as important in the event you cancel your membership, confirm the site or organization can NOT continue to sell your images, or continue to use your images to promote their site etc. Make sure people can NOT download large res files without payment because nefarious or perhaps uninformed web surfers will just go ahead and print the images for themselves, or use them in ads, websites etc. It’s a good idea to watermark your images if possible to prevent this. I don’t watermark the photos on my site, www.johnbentham.com and I’ve only encountered a few minor web usage infractions over the years, which is not to say more haven’t occurred. I’m just blissfully ignorant of them. Many people are not aware they need to pay, or even ask permission to re-post your photos once an image appears on the web, many people assume if something is online it resides in public domain. Photo by Rick Gerrity, DPA Instructor, New Jersey A wonderfully nostalgic and striking photo above of a classic 1960 Cadillac Crown Royal hearse, shot on location as part of a DPA advanced workshop by New Jersey DPA instructor Rick Gerrity is also a shot that could appeal to the auto and car collector market, the outlets for which are innumerable. Rick has captured a distinctly unique angle of a unique vehicle, essentially nailing the trick to a lot of good photography. With a little touch up in Photoshop and some dynamic and intense effects added using NIK Viveza 2 software the shot leaps off the screen ... or greeting card, or calendar, or poster, or web site ... well you get the idea. Photo Hosting and Print Sales Web Sites: These are primarily for photography but if you are an artist or illustrator you could just as easily upload digital files of drawings. You post your photos online, people buy prints online, the site prints and sends the prints (fulfillment), you receive a percentage of the money. Some of these sites have a monthly fee, some are free. Flickr also has a deal going with Getty Images, one of the largest photo syndication agencies, that allows Getty to approach Flickr photographers for independent licensing of images for stock sales brokered by Getty. Photo Hosting Sites: Flickr: www.flickr.com Imagekind: www.imagekind.com Fineartamerica : www.fineartamerica.com Smugmug.com : www.smugmug.com Artchain : www.artchain.com Artistsregister : www.artistsregister.com Digibug : www.digibug.com Zenfolio: www.zenfolio.com Collages : www.Collages.net Foliolink : www.foliolink.com Bigfolio : www.bigfolio.com Creativemotiondesign : www.creativemotiondesign.com

