DPA Magazine
Keeping up Contrast
© Adam Stoltman Look for High Contrast -- this white building would look washed out and unappealing in color. In black and white the image has considerably more impact owing to the extreme difference in contrast between the left hand and right hand sides of the photograph. The eye is also pulled towards the cross in the distance by the lines of the building which are accentuated by the monochromatic effect.
In B&W Less is More
© Michael Hart Black and white can give you very powerful images if you′ll remember that "less is more.." That is, in the absence of color information, strong graphics, and rich blacks and whites, will convey the emotion and strength that you′ve lost by not having color. Sometimes, color is the subject; when things are in black-and-white, you rely more on the strong graphics in your composition to attract the viewer in to your image.
Enhance your Still Life with NIK SilverEfex
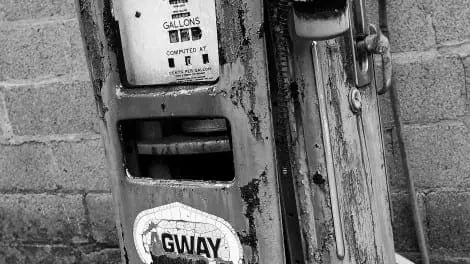
© Rick Gerrity The gas pump image began as a rather lack luster environmental still life but offered potential with the textured details of the faded paint and rusted surfaces. Thanks to the NIK SilverEfex plugin, specifically the structure and contrast levels that are easily manipulated in post capture, the old time meter pops nicely against the patterned back drop of bricks and grass.
Drama in Black and White
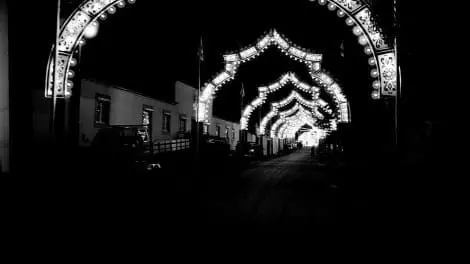
© Adam Stoltman Use Black and White for Drama this night scene of carnival lights in a small village in Portugal is considerably more dramatic than it would be were color values competing with one another. The starkness of the contrast between the two basic tones of Black and White give the image its power, and its mystery.
Creating a Silhouette
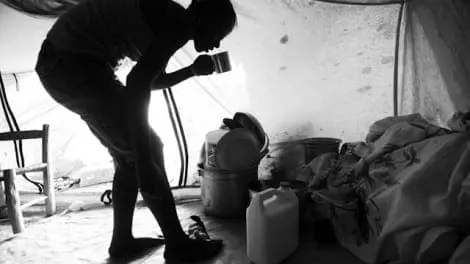
These two images were shot in an IDP (Internally Displaced Persons) Camp in Port Au Prince Haiti. There was late afternoon light which hit the tent and gave it a nice glow. I do not remember exactly what I did technically because I was more focused on the moment than my camera′s technical settings. So to figure it out after the fact, I just looked at my metadata, which you can see easily in programs such as PhotoMechanic For both images below I was using a 17-35 nikon zoom lens. © Jessica Lifland For the silhouette of Anide, above, my camera was set with iso of 1000, fstop 2.8 on aperture priority, shutter speed 200th/s. For the camera′s light meter, the brightness of the tent overpowers her form so the camera thinks it must bring down the exposure to expose for the tent thus underexposing the form of the Anide. This is great if it a silhouette is the intended effect. © Jessica Lifland The picture of Peterson and his sister in the door of the tent was shot in manual mode. The two images are about 70 frames apart in the take and somewhere in between them, I switched to manual mode. I must have figured I′d get another silhouette since he is backlit too, but here I wanted detail in the foreground. The exposure here is iso 800, fstop 4.5 @ 320th/s shutter speed. Both images were shot in RAW mode and converted to black and white in Lightroom afterwards.
Converting to B&W with NIK SilverEfex Pro
© Bobbie Goodrich This image was taken in Cody Wyoming, in fragmented strong light at 9am. This image was converted to Black and White using NIK Silver Efex Pro and the background created with Photoshop used as a plug in for NIK.
Consider Atmosphere
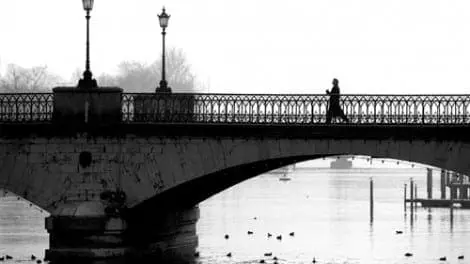
© Michael Hart Consider atmospherics. That is, the subtle fog and haze in these two photos dictated to me that they would work very well as black-and-white images. The information that was left because of the mist and fog helped create strong graphics that carry the photos more strongly, in my opinion, than if I had left them in their original color rendition. © Michael Hart
Bring your B&W Digital Images to the Next Level
© Russ Burden I′ve logged many an hour in the wet darkroom standing over trays, chemicals, and tongs watching prints emerge from the developer. Those were some great times. Hours, that seemed like minutes, would go by tweaking contrast, exposure, dodging, burning, and masking each print. Just me, the hypo, my Graylab timer, and my music. Each session taught me a new nuance regarding filter grades, time in the developer, feathering the light, and so much more. It certainly gave me a one up when I made the transition to Photoshop. It′s sad that many Photoshop users won′t ever get this experience or don′t understand why the dodge and burn icons appear as they do in the toolbar. Those of you who now have a smile on your face can certainly relate. While I lament the shutting down of my wet darkroom, I rejoice in the ease and capability Photoshop offers to make stunning B&W images. Use the following tips to bring your B&W digital images to the next level. © Russ Burden While it performs the task, I encourage you to not use the easy method of going to Image>Mode>Grayscale. It lacks the snap and punch that′s necessary to create a good B&W image. I also urge you to not use Image>Adjustments>Hue Saturation and move the saturation slider to the left. Again, it produces a flat impression. A method that does result in a good print is Image>Adjustments>Channel Mixer. It provides more control regarding contrast and how given colors in the original capture are replicated in shades of gray. It proved to be my stand by method until Adobe incorporated a B&W converter into Camera RAW in addition to adding a B&W Adjustment Layer in Photoshop. I′ve since abandoned the Channel Mixer for either of these two methods. © Russ Burden
Black & White is a Click Away
When photography was invented, B&W was the only game in town. As it evolved, so did addressing the quality of the print. Getting a wide range of tones from pure white to pure black was the goal of every good photographer and darkroom worker. It finally evolved into an art form and grew in popularity. Many B&W masters shunned color photography when it was introduced. But as color grew in popularity, B&W began to take a back seat and was left to the truly dedicated. Thankfully, with the advent of digital cameras, B&W is making a huge resurgence. © Russ Burden A black and white image is as close as a menu click away on your point and shoot. Access the Record Menu on the back of your camera and navigate to the Color Mode or Film Equivalent setting. Check your manual to see what it’s called. Simply click on the setting that says B&W and you’re off to a world of colorless wonder. Experiment, play, and simply have fun. Capture the kids, an architectural subject, a day at the beach, a hike, a bike ride or simply a shot in the back yard. Incorporate shadows into your subjects as they play an important role in B&W captures. The next time you’re at a wedding, make some B&W images of the bride and she’ll love them. Some cameras even have a sepia setting - translation = bonus. Give it a whirl. © Russ Burden If you prefer to photograph in color, there are many software programs that allow you to easily convert the file to B&W. Chances are the software that comes with your camera allows this. If not, you can always use Photoshop or Photoshop Elements. Both provide tools that produce museum quality B&W images. In Photoshop, there’s a fantastic adjustment layer that enables you to lighten or darken specific colors of the original color capture. I think about the hours I spent in the darkroom to come up with a print about which I could feel proud. Now, with a few mouse clicks and a couple of minutes, I get the same result.
B&W in the Serengeti
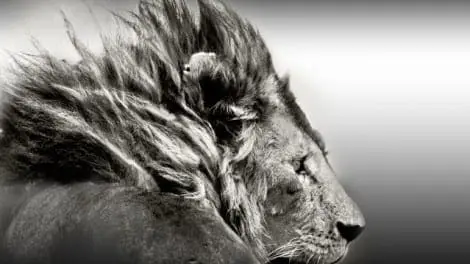
© Bobbie Goodrich This photo was taken in Serengeti National Park in Tanzania. Tihs image was originally a color photo, taken mid day in bright sunlite and it was overexposed. I fixed exposure and noise issues in NIK software and converted the image to black & white using Silver Efex NIK software and eliminated the blown out background with a gradient in photoshop.


