DPA Magazine
Photographing Animals with a Lensbaby
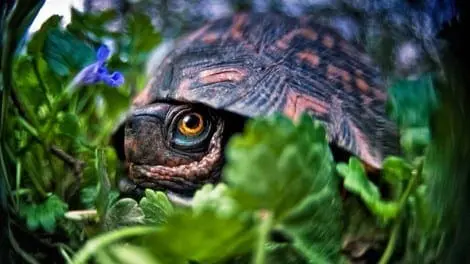
Photographing Animals with a Wide Angle Lens or Lensbaby text by John Bentham Wide Apertures, Fast Lenses: When shooting in low light the faster your lens (wider the aperture) the higher your shutter speed can be, which reduces the chance of camera shake and minimizes subject movement. With a faster lens you won’t need to raise the ISO as high, thus minimizing the digital noise you may get at very high ISO’s like 3200. With low light you’re better off with a full time f2.8 lens, or faster. The kit lenses supplied with most DSLR’s have limited capabilities. A kit lens will allow you to shoot at f3.5 if your zoom is set to it’s widest focal length (only 1/2 stop slower than 2.8). But when you zoom out to the longest focal length the mechanical limitations of the lens restrict your aperture to f5.6 or even f6.3, depending on the lens. An aperture of f5.6 is fine for shooting wildlife photography on a bright sunny day but too slow to shoot low light work such as live concert shots or night photography without using flash. However the faster the lens the more it costs. An f4 lens can be $700 - 1000, and an f2.8 lens is $1600, while a f2 lens can be $2500 or more. © Frank Veronsky he turtle in the photo above was described to me by photographer Frank Veronsky a DPA instructor in NJ, as a family friend. He’s a cute little fellow and Frank got us in really close with a very wide angle lens. Not just any wide lens though, it’s a Fish-Eye Optic Lensbaby lens. This enabled Frank to get within a couple of inches and still retain beautiful sharp focus on the eye and achieve the signature Lensbaby soft focus edges. A great shot made even more stunning when Frank applied NIK Software to affect changes in Structure and Tonal Contrast. By bumping up the saturation and contrast this little turtle becomes a turtle with a lot of personality. Lens Filter Tips: Remember, with any choice of lens you’ll need to add approx $25 - 75 to the cost for a protective UV filter. The UV filter acts as a full time lens cap, allowing you a little more readiness when you see a shot. It also protects the lens from scratches. In the event the filter does get scratched or broken you simply replace the filter instead of replacing the front lens element which could cost 1/2 the price of the lens or more. If you shoot outdoors in daylight, a Polarizing filter is also very helpful. See DPA tips on using Polarizing filters. See additional information in the tips: Digital Sensor Sizes, The X-Factor and How it Affects You, and Power Up with a Polarizing Filter.
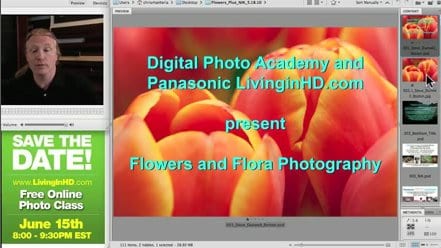
John Bentham′s Flowers & Flora Webinar
On May 18th, 2010, John Bentham delivered a 90 minute webinar about flower and flora photography with the last 30 minutes dedicated to exemplifying the use of Nik Software plug-ins.
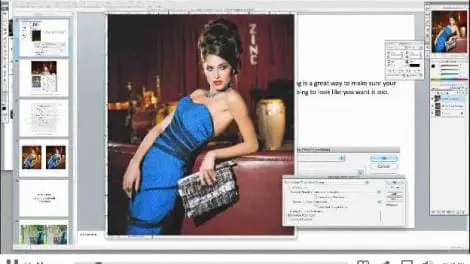
Datacolor – Perfect Prints Webinar
// <!]> DPA NJ Instructor Frank Veronsky and Datacolor′s Education Manager Josh Fischer present a webinar on how to get Perfect Prints, using Datacolor′s Spyder products to calibrate your monitor and printer.
The Beauty of a Scan
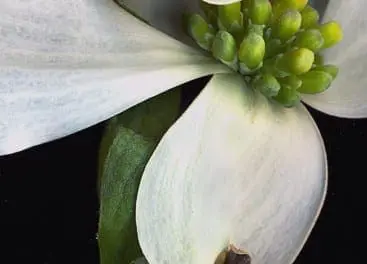
0 false 18 pt 18 pt 0 0 false false false /* Style Definitions */ table.MsoNormalTable {mso-style-name:"Table Normal"; mso-tstyle-rowband-size:0; mso-tstyle-colband-size:0; mso-style-noshow:yes; mso-style-parent:""; mso-padding-alt:0in 5.4pt 0in 5.4pt; mso-para-margin:0in; mso-para-margin-bottom:.0001pt; mso-pagination:widow-orphan; font-size:12.0pt; font-family:"Times New Roman"; mso-ascii-font-family:Cambria; mso-ascii-theme-font:minor-latin; mso-fareast-font-family:"Times New Roman"; mso-fareast-theme-font:minor-fareast; mso-hansi-font-family:Cambria; mso-hansi-theme-font:minor-latin; mso-bidi-font-family:"Times New Roman"; mso-bidi-theme-font:minor-bidi;} © Jarvis Grant These macro photos are of Dogwood Blossoms. Instead of a camera to make these images I used a flatbed scanner. The scans were made at 100% magnification of 1 inch by, 8 inch at 4800 ppi. They were processed in Photoshop with minimal tonal enhancement, some Dodging & Burning using Soft Light. For this technique, a new layer is placed at the top of the layer stack. This layer is set to Soft Light Blending mode. Then using a soft edge paint brush, set to 22% opacity in the Option Bar, paint with Black to make local areas darker and paint with White to make local areas lighter.
Think Big by Shooting Small
© Wolfgang Kaehler In Madagascar it is relatively easy to photograph wildlife because many of the animals, like the chameleons, don’t move very fast and are almost tame.. The fun thing about photographing chameleons is that they come in different colors and sizes. For some you need a macro lens because they are the size of your thumb, for others a short zoom lens will do. I like to find some grasshoppers and place them within about 3 feet of the chameleon. The chameleon slowly moves closer and when within striking distance, the tongue shoots out and catches the grasshopper. To capture this, you have to set your camera on continuous shooting and use the fastest shutter speed or flash.
The Right Lens
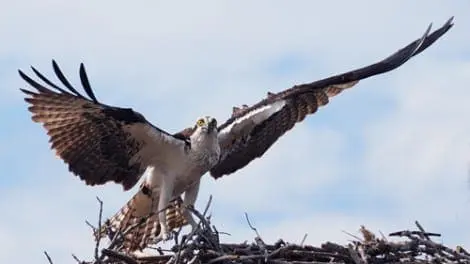
© Ellen Yeiser When photographing animals it is impotant to be mindful of the lens you choose to shoot with. To photograph animals effectively a telephoto lens of at least 200 is very helpful. The osprey was photographed in Florida. Even with a 200mm lens the osprey was uneasy with my closeness. In this case, it worked well as he flew away and I was able to capture him with his wing lifted.
Show the Environment
Showing the Environment Rather than filling the frame with just the animal, include some of the terrain or location in which it resides. This establishes a sense of place and educates the viewer about where and how the subject dwells. Refrain from fully zooming the lens or getting too close. While it feels great that an animal trusts you to get close enough, it may not make the best image. By all means, get in tight and create the head shot as explained above, but learn to back off a bit a go wider. A more common flow of events is to progressively let the animal gravitate closer to you or slowly enter its world to get the head shot. Should this be the scenario, even as you’re getting closer, think about the perspective of the shot if while you were close, you went wide and get a unique look to your wildlife images.
Portrait vs Environment
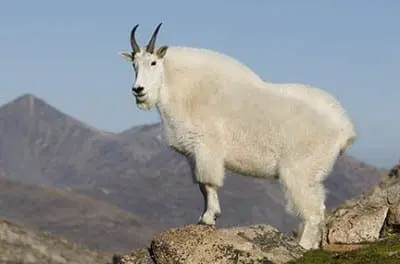
© Russ Burden The environmental image tends to be more of a story teller as it denotes a sense of place. The head shot is powerful as it provides an up close and personal look at the species. Both have their place in wildlife photography and I strongly encourage you to capture both options. Regardless of the one you choose, adhere to the compositional rule of thirds. © Russ Burden For the head shot, the eyes should fall into the top third of the frame. For the environmental image, position key elements into the power points that constitute the position of a third to create balance and intrigue in your compositions.
Less is more
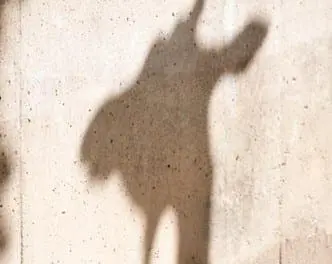
© Hinda Schuman Animals like anything else one photographs often benefit from the less is more approach. In this case at the Zoo i was photographing a large animal, and chose just to look at his (her) shadow. At first it is not clear what we are looking at. But that is part of the fun. Try looking over, under and behind the action for any assignment you find yourself photographing. © Hinda Schuman
John Bentham′s Wildlife & Pets Webinar
On April 20th, 2010, John Bentham held a webinar featuring images from the 60 DPA instructors from around the country, as well as a few images submitted by DPA students. Watch the video below for tips & tricks on wildlife and pet photography.

