DPA Magazine
Skeleton Crew
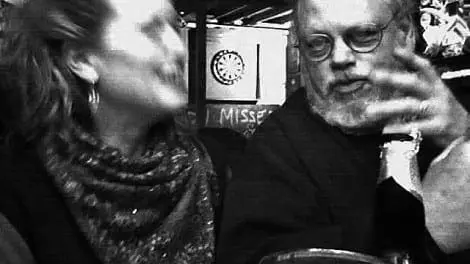
© Rick Wright Sitting down for a couple drinks with friends can be fun and merry, edifying and spirited. Nothing, however, spoils the mood more than popping up your FLASH and "incinerating" everyone′s dilated eyeballs in dimly lit rooms. At one of my favorite dive bars in Philadelphia, I was sitting in with two friends. In such LOW LIGHT situations, FLASH is just one solution and really not the best. ISO comes to your rescue! ISO (International Standards Organization) is a series of numbers that reflect how sensitive your sensor is to light. The higher the number, the less light you need to make an exposure. Moving your ISO setting up from 100 (good for daylight) up to 800, 1600, or even 3200 will let you make a picture WITHOUT FLASH under poor lighting. All the natural nuances are preserved and your happy band of friends won′t seethe at your flashing. You′ll get better expressions and good decisive moments too. The downsides of higher ISO settings? Well, you′ll see more noise in your image. But, "frankly", that is just the look and feeling I was hoping for in this moody, black & white, gritty-and-grainy scene. As a small bonus, my friend at left moved her head very suddenly and created
Ready for the Moment
© Judith Farber This shot in Central Park was created by being ready at a great location. With street photography, being quick on the shutter means the difference between shooting at that decisive moment that gets your heart pumping, to just being the observer of yet another passing scene. When finding an inspiring location, plan ahead. Have your camera setting ready to go, so when that perfect situation finds its way into your frame, you are prepared and ready. After shooting in this location numerous times, I′ve rarely seen people stand in the center of that circle, most avoid it and walk around. Being an area of energy you would think it would draw people in. But the opposite happens. It′s those unexpected baffling perplexities of the human condition that keep me inspired to photograph on the streets.
Observe, Don′t Intrude
© Adam Stoltman Observe, but don′t intrude. A good photographer keeps his/her eyes open at all time constantly observing his surroundings and taking in the visual environment. Observe, but don′t intrude, is a good rule of thumb, as in the case of these two lovers along the Seine river in Paris. By shooting from a comfortable distance with a short telephoto lens, the photograph has a timeless quality -- and captures a moment instantly recognizable to all romantics. If the photographer had tried to get too close, and inserted himself in the situation, the subjects would likely become self conscious, and the moment would be lost.
Keep your Subject Occupied
© Doug Carver Nonprofessional subjects are much more relaxed if they are engaged in an activity. Choose your equipment and settings to contribute a visual style that enhances your subject and environment.
The Peak Moment
© Adam Stoltman When photographing action, or activity, look for the "Peak" moment. That is the point at which the action reaches it′s apex. In Basketball, that may be the moment a defender has his arm fully extended, as in the example here, in tennis it might be the moment a player lunges for a volley, in baseball, it may be the instant before the pitcher releases the ball at the end of his wind up. The moment is different in each case, but the principle is the same. By training your eye to see these peak moments, you will produce more and more winning pictures.
Let Go!
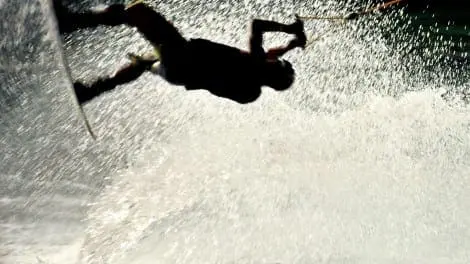
© Douglas Carver The more you participate in your photographs, the stronger the images will be. Draw inspiration from your subjects. If they are pushing the limit in taking chances, the odds are that your pictures will benefit from a similar intensity of approach. Emotion is more powerful than detail. Go ahead ... back light, lens flair... Let it go!
Glider Rides
© Chuck Place In the Santa Barbara area, fall is a time of cool mornings, warm afternoons and trying new things. A glider ride is something I had never experienced but had always wanted to try. I photograph most everything I do and when I got to the glider port, I realized that a glider cockpit is so tight that there would be no turning around to photograph the pilot in the air. A digital camera made the process quite simple, however. I set my camera exposure on the ground before we took off and mounted a wide 20mm lens, set to auto focus, on my full-frame camera. Once airborne, I placed the camera on my shoulder, pointing back toward the pilot. I checked each shot, moving the camera slightly each time until I had the image I wanted. It was simple. The feeling of soaring freedom in virtual silence was quite an experience, and it was all mirrored in my pilots face--a perfect shoot.
Diffusion on the Spot
When you′re photographing indoors, most of the time the artificial light is insufficient for good sharp photos - so bring your flash! Even better, bring a friend who can hold up a large white board, and bounce your flash into the board, rather than directly at the person - the light will be much softer, and, more importantly, it′ll have a direction other than directly from above the lens - the shadows on your subject will create a 3-dimensional effect, missing in direct-flash photos! Finally, put the camera in manual exposure, set the aperture for something that the flash can do when bounced (it′ll lose a lot of light!) such as F4 at ISO 200, then take some quick test shots, without the flash, to determine how low you need to set the shutter speed, in order to see some light in the background. Don′t be afraid to go down to one full second (as in this shot), as long as the person still looks like a black silhouette (the flash will light them up!). Later, in the computer, don′t be afraid to play around with the orientation of the image, and to crank up the vibrance of the colors!!!
John Bentham′s Tricky Lighting Webinar
On October 27th, 2009, New York City DPA Instructor John Bentham led a one hour webinar on tricky lighting with images submitted by all 60 DPA instructors across the country. In partnership with LivingInHD.com, DPA has begun to host monthly webinars, with a different theme each month.
John Bentham′s Travel Photography Webinar
On August 25th, New York DPA photographer John Bentham led an hour long webinar on Travel Photography, showcasing his images as well as a selection of images from the other 60 DPA instructors.


