DPA Magazine
Portraits by the Water
© Hinda Schuman If you are interested in portraits or just including people in your photographs one of the great places to find a source of subjects is by the water. People are relaxed, or involved, doing something they love or at work. Therefore they will likely ignore you once initial introductions or requests are made. You are then free to go about making pictures, using the water as part of your subject. You can see it mysteriously move, change colors or show wildlife in new forms. Your subjects will interact with the water and not you, leaving you free to compose, think and shoot. © Hinda Schuman
Manual Exposure
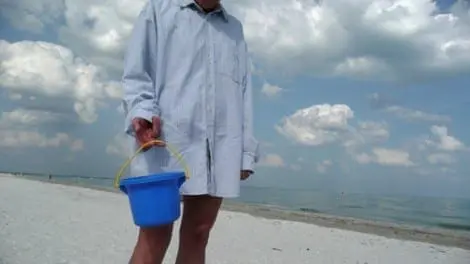
© Darren Hauck Don′t let the camera tell you how to expose a picture. In automatic mode the camera is programed to make a picture with a exposure of 18% grey, completely neutral. Now this may be good if you want to take a picture of your kids at a awards ceremony but it does not help you if you want to be a bit more creative. Here at the air show with the dramatic clouds and the beach i turned the camera to Manual mode and picked a exposure that would not over expose the sky. Doing this it makes the scene much more dramatic and over all a more interesting picture. Don′t be afraid to tell the camera to shut up, explore life outside of what is 18% grey.
Light & Water
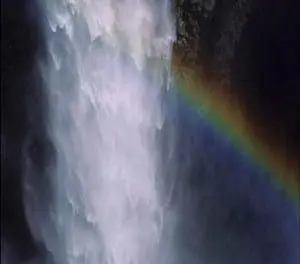
During my travels around the world, I photographed water everywhere. Water is one of our most important resources and we have to manage it very carefully. © Wolfgang Kaehler One of my favorite subjects to photograph relating to water is a waterfall. Depending on the angle of the sunshine you get beautiful rainbows. To freeze the water while plunging down, you have to use fast shutter speeds such as 1/500 of a second. © Wolfgang Kaehler When it is overcast I try to use the slowest shutter speed possible. I set my camera up on a tripod and try to use shutter speeds below 1/10 of a second to make the water look silky. Sometimes I use a neutral density filter to achieve shutter speeds of 1 or 2 seconds. This totally slows down the flow and makes the water look soft. © Wolfgang Kaehler There are plenty of other opportunities to photograph water. On a hot day kids love to play in fountains. In desert countries many villages don’t have running water and mostly children go to a well or faucet to get water for the family. I try to use as much as possible backlighting to bring out the water. The same when I photograph water in nature: the backlighting put reflections onto the water drops and makes the image alive. In case of the spider web in front of a maple tree, I used a long lens with a wide open aperture to separate the web from the tree and have the tree blurred
Go Abstract!
© Robert Bengston 1.) See it as an abstract and take a detail. Use a part to become the whole! © Robert Bengston 2.) Go abstract. Even go B&W if you want to. Keep them guessing! © Robert Bengston 3.) Into the Light! Don’t be afraid to shoot directly into the reflection of the sun. Sometimes it can work well to really illustrate the luster of the water!
Fill the Frame!
© Kathy Tarantola Filling the frame with your subject is a great way to grab your viewer’s attention. Try coming in closer by using the zoom or actually stepping closer to your subject. In this case I stood in the water and kept the camera low as the swells of the waves approached - then quickly got the camera up and out of the way! This was taken with my point and shoot, but for a more expensive camera, I would rent a waterproof housing and really get into the water! Cameras don′t like water - especially salt water, so be careful. Remember the rule of thirds and keep your horizon line either to the top or bottom third of the frame. This is more of a hit or miss operation since it’s hard to predict the swell, but that’s why we love digital photography. Keep shooting!
Rethinking your angles
© Joe Robbins Go for the unusual angle. Looking up, with a silhouette effect is not the normal way to see these structures and can make your subject stand out. Walk all around looking for every angle. Come back at the opposite time of day and look for new shots that did not appear in the other time of day. © Joe Robbins
Landscapes in Black & White
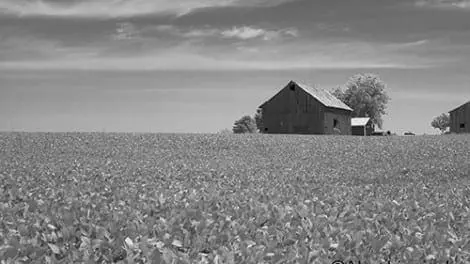
© Alex Lippisch Having grown up here in Ohio, I am visually drawn to old barns and farm landscapes like this one. A 70 mm lens on my 35 mm full-frame camera, allowed me to capture the wide expanse, but more importantly it gave me the right amount of perspective to create the look I was after. The size relationship between the corn in the foreground and the barn is slightly exaggerated and, for me, interesting as a contrast. The large amount of sky and corn field, sets up an engaging negative space as well. Since the sensor in digital cameras captures a 3 channel color image, I always use the camera′s color mode (instead of the B&W mode) and save it as a RAW file. For this image I made the conversion to B&W in ACR (Adobe Camera Raw). ACR has an incredible selection of adjustment options for how to process a RAW file to B&W (otherwise known as grayscale). I used the Hue and Saturation sliders to darken the sky and barn surfaces, and lighten the corn, for an almost infrared photo look common back in the days of shooting infrared film. Other ACR adjustments were made to the contrast, brightness, and sharpness of the final image.
Be Mindful
© Joe Robbins Most important aspect of shooting these guys is plan ahead for a quick escape, should you need it. Don′t push your luck. Stay your distance. Use a longer lens. Move slowly. © Joe Robbins
Keep a Watchful Eye
© Wolfgang Kaehler Drive slowly through the fields and keep looking around: last year I spotteda nice ‘wave’ in the field just when I came over a hill. I almost missed itbecause the shape of the curve was only visible from one point. I used a 200mm lens to compress the image. Most of the time when I am photographingfarm areas; I am using wide angle lenses, tripod and aperture settings of F16 or 22 to get the maximum depth of field.
Rain Rain Go Away
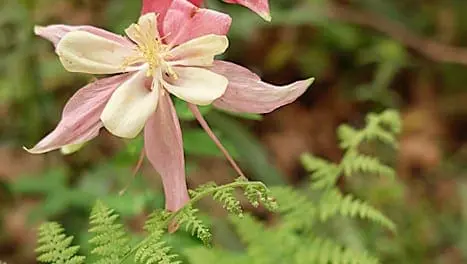
© Rick Wright Ah, who said you can′t go out and play in the rain with your camera? Especially when exploring a new camera, rain or shine is my motto! In fact, the overcast skies and slight darkness are a perfect time to learn a few tricks for shooting in low light. I spotted these two amazing flowers while walking along a lake road—utterly glowing with color. Diffuse light (from overcast skies) is terrific for flowers as it evens out the light and produces rich saturated color. I opened my lens fully to ƒ2.8 and bumped up my ISO to 200 to get a 1/40th second shutter (right at the edge of being safely handheld). I could have used ISO 400 for more stability, but didn′t want more noise/grain as those petals should look velvety. Instead of faster ISOs, try this extra steadying technique while hand-holding any low light shot. Switch on the self-timer and let the camera release the shutter for you, rather than your clumsy, motion-inducing finger. It works great. I also added some light by adjusting my +/- exposure control by +.07. It brightened up the shadows just the right amount, and ƒ2.8 gave a nice soft effect in the background.


