Shooting Video on HD DSLR Still Cameras, Workflow, Stabilization Rigs and Brackets
I get a number of inquiries from students who are moving into DSLR Video shooting (shooting HD Video on a DSLR camera). Obviously for quick, down and dirty video you only need a video capable camera. But once you dive in, you should learn a few tricks and you will covet a few gadgets. Number one for many of budding film makers is some type of balancer, bracket or video rig, referred to as a stabilization rig. A number of these are available and specifically made for shooting video with DSLR cameras. I have a few friends who use Redrock rigs, these however can be quite expensive.
Batteries and Memory Cards: The couple other very important tips for DSLR filmmaking are batteries and memory cards. Batteries will wear down very quickly when shooting video. Unlike in still photography where the viewing screen only lights upo when you take a photo, or you review a photo, with video shooting you utilize the electronic screen for framing and composing while you are filming. This can drain battery power. Thus if you’re serious about video filmmaking I recommend at least one and preferably two, spare batteries. The same principle applies to memory capacity (memory cards). The camera uses significantly more memory to record video than to capture still photographs. A working average for HD recording is approx 7 minutes of video for each MB of storage. Thus if you want to shoot 45 minutes of HD video you require approx 6.4 MB of storage. You can use a number of 2 –4 MB cards but bear in mind if the video you’re shooting is a continuous take you need a large enough card to record the whole segment. Alternatively, or in a pinch you can reduce the HD quality of the recording to boost the record time, but that seems to go against the whole point in purchasing a good HD camera.
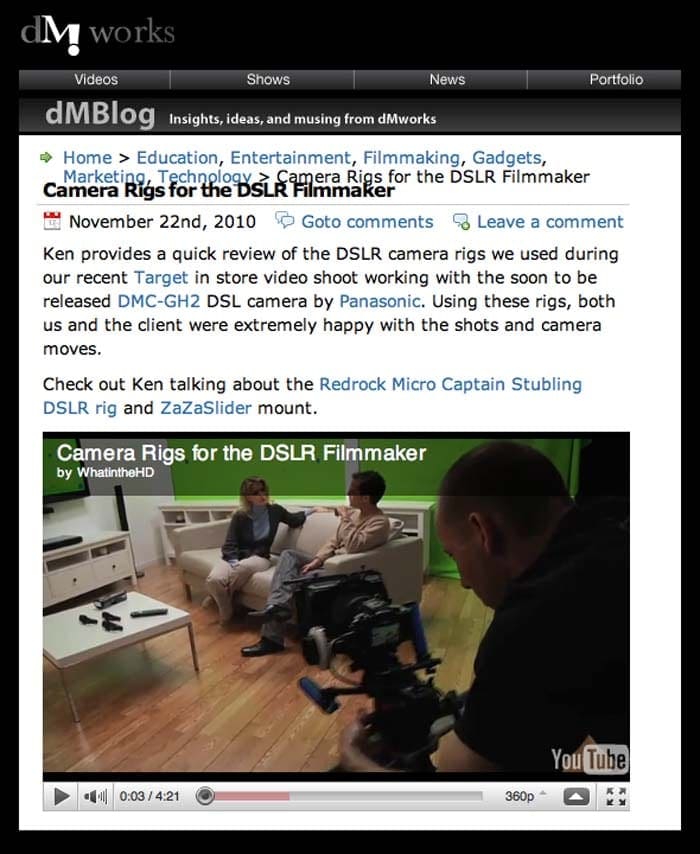
Camera Rigs for the DSLR Filmmaker: Ken Fleischer is a filmmaker, video guru and owner/CEO at dMWorks (dmworks.com). As Video Expert for Panasonic Living in HD ken uses DSLR cameras for some of his work. Check out this great link from the dMWorks blog, where Ken Ken tests the new Panasonic GH2 and describes the different options for camera support.
AVCHD Conversion Workflow: Ken Fleischer has also helpfully provided a workflow for converting video files below.
With an AVCHD camera, the normal workflow would have two steps.
1) Make an archive copy of the original AVCHD that preserves all the camera specific info. Then, you have an original copy of the contents of your camera that you can
mount anytime as if it were a camera. You must have the entire directory structure of the camera – even the empty folders. If you only have the mts files, you cannot open. Programs like iMovie or Roxio make it easy to create this archive copy on their import or copy/convert screens.
2) Then, you import the AVCHD files directly into your editing program, like iMovie for Mac or Roxio for PC. You can either import directly from the camera, or directly from an SDHC card, or you can import from the archive. When you do this, the highly compressed AVCHD is converted to Quicktime or AVI for editing.
Having said that, if all you have are the MTS files, you could convert them yourself with a third party tool like Voltaic HD. Voltaic is not free, but you might be able to get an evaluation copy.
Also for you reference, After you′ve edited or just trimmed your video; I′d recommend the following settings for HD video on the LivinginHD.com site…
Compression: H.264
Resolution: 1280×720
Frame Rate: (Same as the original footage)
Data Rate: 4000 (You may need to adjust this number depending on final file
size.
For audio you can just us AC3 at 44.1 or 48 KHz 16bit Stereo.
Video Capable Panasonic DSLR Cameras: Following is an outline of the various Panasonic DSLR video camera.
All are Micro 4/3 System, with 2 x Lens Factor
GH2 is 16MP, All other models are 12MP LIVEMOS Sensor
Sensor Size = 17.3 x 13mm
All will shoot RAW Still mode
All lenses are interchangeable, Optional lenses below
Panasonic G2 W 14-42mm lens (= 28-84mm)
HD Lite Video (720P)
Articulated LCD Screen
Touch Screen Controls
Panasonic GH1 Kit 14 – 140mm (= 28 – 280mm), f4-5.8
Has Full HD Video (1080P)
Electronic Viewfinder
Articulated LCD Screen
Stereo Mic AND External Stereo Mic input
Panasonic GH2 – 16MP in kit, choice of Kit w 14 – 140mm lens (= 28–280mm), f4-5.8, or Kit w 14 – 42mm lens (= 28-84mm) f3.5 –5.6
Has Full HD Video (1080P)
Electronic Viewfinder
Articulated LCD Screen
Stereo Mic AND External Stereo Mic input
Touch Screen Controls
Panasonic GF1 Kit
Sold as kit, w choice of lens: 20mm f1.7 Pancake, (= 40mm), or 14-45mm Standard (= 28-90mm), f3.5 –5.6
Has HD Lite Video (720P)
Ships w/o Viewfinder (Optional Electronic Viewfinder available)
NO Articulated LCD Screen
MONO Mic, NO External Mic input
Panasonic GF2 with 14mm F2.5 Lens Kit Or Panasonic 14 – 42mm Zoom Lens Kit.
With touch-screen control. It is built around a 12MP CMOS sensor but with a more powerful processor than its predecessor, allowing AVCHD video recording of 1080i60 movies from 1080p30 capture. Significantly smaller and lighter than the GF1.
NO Articulated LCD Screen
Additional/Optional Panasonic Lenses (2 X Factor)
Lenses have OIS (Optical Image Stabilization) except as noted below
Focal Length / 135mm Equivalent Focal Length (2x Factor) / Max Aperture
14mm Pancake (= 28mm), F2.5
20mm Pancake (= 40mm), f1.7, NO OIS
14-45mm Standard (= 28-90mm), f3.5 –5.6, OIS
14-42mm Standard (= 28-84mm), f3.5 –5.6, W G2 Kit
7 – 14mm (= 14 – 28), f4, NO OIS
45mm (= 90mm Prime Macro, f2.8, NO OIS
14 – 140mm (= 28 – 280mm), f4-5.8, OIS
45 – 200mm (= 90 – 400mm), f4 – 5.6, OIS
8mm Fisheye Lens (= 16mm) Prime, f3.5, NO OIS
3D lens LUMIX G 12.5mm, F12. Only for 3D compatible models.

