DPA Magazine
Balance the Natural Light
As we climbed the dark and narrow stairs to the top of Notre Dame, I was stuck by the worn steps of marble, and the contrast of the light / dark, circular stairs / rectangular window. Normally this can be a tough situation for an automatic exposure setting. The dark stairs would make the flash want to fire, so I forced it off and the bright sunlight from the window might make the lens stop down too much and then the stairs would be too dark. In this situation, I was sure to balance the subject between the light and dark to make the camera behave the way I wanted it to, This would be easier with a camera set on manual, where you can choose the depth of field and the shutter, but on a point and shoot camera, you only have so many options. You have to learn how to “fool” the camera. Even with the bright window light, the camera fired at 1/10th of a second (which exposed the stairs correctly), so I still had to hold steady. © 2008 Kathy Tarantola, Boston DPA Instructor
Fun Angles and Low Light
This image of the Eiffel Tower in Paris was taken with my small Panasonic FX-30 at ISO 800. Even so, the low light required a 1/8th of a second shutter speed. I was careful to hold very steady – I actually hold my breath for a second- and with the help of the image stabilization feature in that camera, was able to make a decent shot. I would normally recommend a tripod. Since everyone has photos of the Eiffel Tower, I tried to see it a new way and have fun with the angle. © 2008 Kathy Tarantola, Boston DPA Instructor
Autumn Photography
Washington DC DPA Instructor Dana Bowden offers 5 tips on photographing in the autumn time: Tip #1: COMPLIMENTARY COLORS often exemplify the beautiful fall colors as shown in the image of bright scarlet leaves against a deep blue sky. © Dana Bowden Tip #2: A DRAMATIC SKY with a silhouette of the dark leaves is also quite dramatic. © Dana Bowden Tip #3: TRY A DIFFERENT ANGLE, like these tall trees from the ground up. . © Dana Bowden Tip #4: THE SNOW CAPPED MOUNTAINS IN THE BACKDROP create a depth of field and emphasize the fall colors of the trees. © Dana Bowden Tip #5: USE A TELEPHOTO LENS to get a close up of the leaves and bring out their color with the simple but intense blue sky. © Dana Bowden
Illuminated Tulips
Kept in a stoneware vase, these tulips grew longer and longer as the petals were almost ready to drop. Eventually, the curving stems were as interesting as the fading blossoms. A painter′s canvas background simplifies the composition, and a small light box on the left dramatizes the curving stems. Simpler is better. © Steve Dunwell
Not Everything Has To Be Fill Flashed…
Every once in a while I come across a scene in my daily photographic encounters, knowing that if the subject knows I am there, the mood, and whole scene, will be altered forever. This was once such case as I was assigned to photograph Tucson′s only Jewish museum, as I moved about some of its rooms. I happened upon this scene as the executive director at the time, Josh Protas, was looking at what he believed was an original piece of stained glass. © David Sanders Josh Protas, Executive Director of the Historic Stone Avenue Temple, holds up a piece of stained glass section, that he believes was a part of the Temple′s three large windows at some point between 1910-1930. With the Temple being Tucson′s only Jewish museum, Portas also spoke of preserving the state′s oldest Jewish community. The warm afternoon light lit up what he was doing perfectly, and to use a flash and illuminate the scene would have taken the beauty out of it, and Josh would have stopped doing what he was doing. Therefore, I opted for creating a silhouette, using a wide angle lens in this small room to with a spot meter to meter the brighter light of the window areas, knowing that he would go silhouetted as a result. The result is an uninterrupted scene bathed in its natural light.
Fall Tips
DPA Boston Instructor Steve Dunwell shares five of his favorite tips for photographing in the autumn time: Tip #1 - Fall Foliage To photograph fall foliage, simple close-ups highlight individual maple leaves, and make effective compositions. Soft diffused light is best for this type of image, and in this example, the pattern on the stone wall was created by the wind. © Steve Dunwell Tip #2 - Maple TreesSome maple trees, at peak foliage, are remarkable specimens of nature. Show the whole tree, if possible, to include the colorful top. A polarizing filter darkens the sky and saturates the color of the leaves. © Steve Dunwell Tip #3 - Lake ReflectionsTry photographing a clear blue sky with autumn colors on a lake with reflections - it looks great, but can sometimes make a dull photo. Add foreground foliage to create an interesting frame for the composition. You can also use a graduated filter to darken the sky and balance the water. © Steve Dunwell Tip #4 - Turning LeavesAs leaves turn and some of them fall, the branches are less opaque, allowing the photographer to "look through" many layers on trees. Using a telephoto lens increases this effect, and helps eliminate the graying sky. © Steve Dunwell Tip #5 - Moving WaterAutumn leaves lend the perfect accent to close-ups of moving water. Wet leaves are more colorful, and they stick to dark rocks; the whole scene becomes more luminous. Use a slow shutter speed (try 1/2 second) to blur the water. © Steve Dunwell
The Spirit of Fall
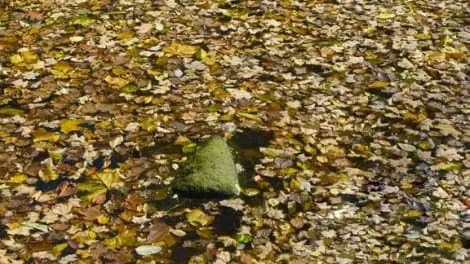
In the spirit of fall, the leaves that are already down sometimes form interesting patterns where they land. In this case, a creek with a rock that sticks out and forms whatever you want to see in it. When out with your camera it is important to look up and down; don′t just limit your view to straight ahead. And think about the little picture - as opposed to the big picture. This image has some vibrance enhancement to it - it was done in Camera RAW. © Hinda Schuman
Fall Foliage Photography
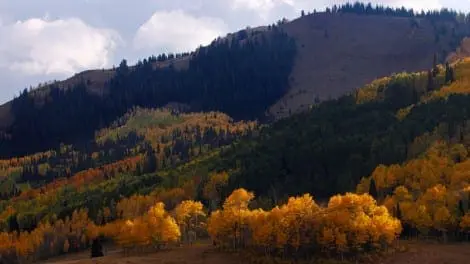
Fall is one of the most exciting times to be out shooting landscape images because of the spectacular color found in the trees dotting the hillsides. Here′s one tip for getting a great photograph when you get out there. When you are surveying the opportunities while you are hiking or driving, look for situations where the trees are backlit. That′s because the added contrast of the leaves being lit from behind will make them more luminous, adds more depth, and makes the color pop off the page. Just look at this example to see what I mean: © Allen Birnbach
Chair Foliage
Fall foliage often conveys a sense of tranquility and even halcyon days of yesteryear. To add to that impressionistic sensibility, incorporating a prop can be quite effective. For example, the old chair in this photo, that is covered by the colorful leaves, creates a dream-like aura. © Frank Siteman
Fall Aspen By Moonlight
I recently spent a few days high in the Sierra Nevada Mountains of California photographing fall aspen trees. The bright yellow leaves always contrast beautifully with the clear blue sky and often snowy mountain peaks, but I was looking for a new approach. A friend had mentioned experimenting with moonlight exposures and how they looked rather like daylight exposures. It sounded different so I decided to give it a shot. Digital cameras have been notorious for producing lots of noise with long exposures and high ISOs, but manufacturers have introduced very effective noise reduction solutions during the last couple years. I was going to be using 30-second exposures with my 24-70mm zoom set to f2.8. I would merely bracket ISOs to get a reasonable histogram. After the initial 30-second exposure, the camera records a second exposure with the shutter closed. This second exposure records only the noise produced by the chip during the long exposure. This noise is then magically removed from the first exposure, giving clean black shadows that would normally be filled with noise, especially at higher ISOs. © Chuck Place Two hours after sunset, under a bright moon, the temperature at 9600 feet was literally freezing. I was able to compose the shot with just moonlight, placed the focus at infinity and proceeded to make long exposures at ISO 400, 800 and 1600. To my eye, there were only a few stars in the sky, the aspen were a pale yellow and distant peaks looked close enough to touch. The resulting images were quite unexpected! ISO 800 turned out to be the magic number. The aspen came out a bright yellow, the peaks were highly detailed and the biggest surprise of all were hundreds of stars in the blue sky, including part of the Milky Way. Sunlight reflected off the moon gave me accurate colors and there was no noise in the deep shadows. At the end of the shoot, I couldn’t feel my fingers, but it was worth it to create what was for me a unique landscape. Who knew moonlight was so magical?


