DPA Magazine
Water-Bound Tornado
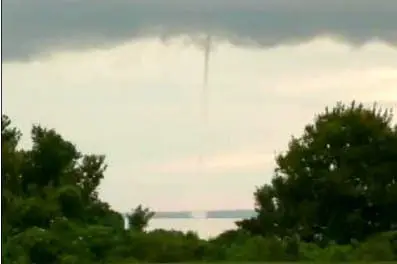
One night while my wife and I were having dinner I noticed a strange cloud formation out over the lake that we live on near Orlando, FL. Every summer the local news will show footage of a water spout at the beach and inform the viewer that a water spout is a tornado that forms over a body of water. Having seen many of these news stories in the past I instantly knew what it was I was looking at outside of our window and I quickly grabbed my Panasonic TZ3. I wasn′t alone in identifying the water spout as my neighbors were outside watching it as well. Turning the TZ3 on and changing the Mode dial to the motion picture setting I composed the picture utilizing the camera′s large LCD monitor on the back of the camera. Pressing the zoom lever to telephoto it allowed me to zoom in to capture the spout touching the lake. I was able to pan up and show the storm up to the clouds. After capturing different angles of the storm I was able to download the video clips to my laptop and edit them together in about 10 minutes using Apple′s iMovie software. After editing a few clips together I instructed iMovie to output the file as a web clip which was then emailed to the local ABC affiliate WFTV in Orlando. Channel 9 used the clip during the intro to its 11 o′clock news cast highlighting their lead stories. I was pretty impressed that while the TZ3′s video is not High Definition it is usable even for broadcast.
Photographing in a Pumpkin Patch
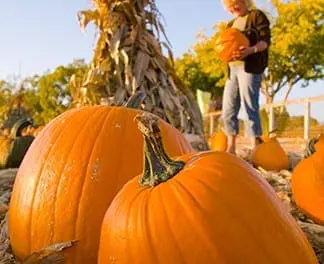
My wife and I were stopping at one of our local pumpkin patches to pick up pumpkins to carve for Halloween. For some families this is a casual affair. My wife, however, is a serious connoisseur of pumpkins and is driven to inspect at least half of the harvest in each field. This leaves me plenty of time to create images. If possible, I try to delay our arrival until late afternoon. The low angle of the sun produces warm light that accentuates the orange and yellow tones of my subjects. Backlighting is perfect for that scarecrow in the corn field and positioning the camera low to the ground near some perfect pumpkins accentuates my subjects while a shallow depth of field allows me to soften people and cornstalks in the background. Some displays of gourds and squash are situated in the shade, so I switch my white balance to open shade in order to get back all the warm tones we associate with the fall season. As the farm stand closes for the day, my wife loads our truck with half a dozen pumpkins for carving and several kinds of squash for cooking. My harvest arrives a little later as I download these fun images to my computer for final output.
Tips for Taking Fall Images
Tips for Taking Fall Images by Dana BowdenDuring the Fall, there are plenty of great photo ops with trees, mountains, skyscapes, and lots of other subjects. Washington DC DPA Instructor Dana Bowden offers some tips to make the most of your Fall images. Hot air balloons are a photographers dream. They provide an abundance of color and shapes, and, they are usually set up at sunrise, when the light is perfect for photographs. For this shot, I positioned myself so the sun backlit the red balloon, and waited for the other balloons to come into the frame. By holding a polarizing filter over the lens, it helped darken the sky, allowing the color of the balloons to come out more saturated. Take Flight © 2007 Dana Bowden I saw this rider on horseback approaching at a high rate of speed, so I knew I would only be able to get off a few frames. I quickly positioned myself low to the ground to get more of the trees, and less of the road in the shot. As the rider came within range, I started shooting while physically moving the camera from right to left. Because the light was at his backside, I knew the shutter would be slower, thus blurring the image. By panning the camera with the rider during the exposure, it gave the background a lateral motion effect by blurring the trees more than the rider. Horsing Around © 2007 Dana Bowden I shot this image while driving in the mountains. I looked for a good vantage point that would include all the different elements of the landscape, including the sky, rocky mountains, and different types of trees. Including the one lone aspen tree on the edge of the frame helped to give the photograph a sense of scale and depth. I was shooting with the lens fully zoomed in, so I steadied the camera on the hood of the car to prevent any blur from camera movement. Maroon Bells © 2007 Dana Bowden While driving on the road and looking at the aspen trees from a distance, they appeared somewhat more dense than they really are up close. I decided to park the car and walk into the middle of the trees to get a different perspective. To make the shot more exaggerated, I laid on the ground looking skyward. (I get some of my best images crawling around on the ground). The early morning light provided a deeply saturated blue sky, and the nice cross light on the trees gave them great separation from the sky. Aspens Reaching © 2007 Dana Bowden While walking through the zoo one evening with my wife and son, the October sky did it’s magic rather unexpectedly. I found a place where I could include the horizon without too many distractions such as buildings, fences, power wires, etc. I didn’t want to have to shoot from a low angle, which can be unflattering for people. I set my camera to fill flash to allow proper exposure of the clouds. By backing away from the subjects while zooming the lens in closer, it helped to soften the flash on them while narrowing the view of the background, eliminating unwanted clutter on the sides of the frame. A Walk in the Park © 2007 Dana Bowden This was shot while standing on a crate looking straight down on the pumpkins. They were actually “dwarf” pumpkins. By cropping in on just the pumpkins, it fills the frame with just the details of the pumpkins themselves, and eliminates anything other information that would distract the viewer, such as scale or position. I turned the flash off, to give the image better contrast between the pumpkins for depth. Box of Pumpkins © 2007 Dana Bowden This image appealed to me because of this perfect pumpkin sitting upright, as if someone had considered it, yet rejected it. The low sun presented the ideal “warm” lighting across the pumpkin patch. I usually try to avoid shooting with the sun directly at my back, however in this instance, while careful not to let my shadow cast on the subject, it worked to perfectly illuminate the whole pumpkin. By moving closer to the pumpkin with the camera lens set at the widest setting, it allowed the pumpkin to appear larger than the rest, while seeing more of the other pumpkins in the background. Pumpkin Waiting © 2007 Dana Bowden With blues, greens, and yellows, all around me, all that was needed for the perfect fall shot was “Red”. As I drove on, there it was, sitting at the side of the road while it’s driver was taking pictures of the trees. It sometimes pays off to be aware of what’s moving around, and how it can change a landscape shot. I used a polarizer over the lens to darken the sky, add contrast, and, cut down the reflections in the sheet metal of the car. By coming in very close, and shooting straight on, it gave just the right amount of distortion to make it seem larger than life. 55 Jag © 2007 Dana Bowden
Fall Foliage, 3 of 3
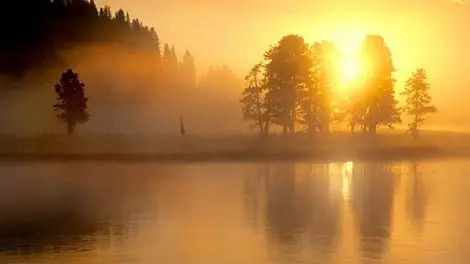
Fall Photo Pointers: Part 3 of 3 by Russ BurdenRuss Burden provides another round of tips and tricks for Fall photography It’s autumn - gone are the mornings of hazy white skies. Sunrise now greets us with a crisp blue and a chill in the air. The air is fresh and clean, a sense of change permeates the environment, and all living forms seem to sense the transformation that’s about to take place. For the photographer who loves color, it’s a glorious time. From the grand landscape to a lonely fallen red leaf to a child romping in a pile of freshly raked leaves, there’s a plethora of subject matter. Whether your passion lies in photographing nature, people, photo journalism, sports, etc., adding a background of fall color will make your images pop. There are so many tips I can share about taking fall photos that I’m dedicating the entire month of September’s weekly Tips to the subject. In this third installment of four, I will take you on a journey showing you how to improve your autumn photographs. Save or bookmark them and when the final installment is complete, you’ll have many tips to help you with your fall image making. Better yet, join me on one of my autumn nature photography tours so I can show you first hand my tips, tricks, and techniques - see last paragraph for info. Bring on the Backlight: Many photographers prefer a certain quality of light in which to photograph fall color. To me, whatever condition I’m bestowed on a particular day, I’ll exploit to its fullest. One of the conditions I’ll most certainly take advantage of is backlight. Autumn colored leaves take on a glow as if each has a built in spotlight that gets turned on to a varying intensity. Find a solitary tree in full fall color and do a 360 degree walk around. Watch what happens to the leaves as the quality of light changes from front light, to sidelight, to backlight. Front light is flat and dull while back light makes the tree come alive. Shield your lens to prevent flare and check your histogram to get the best exposure as shooting into the sun can cause the photo to be underexposed. © 2007 Russ Burden Bring on the Morning Mist: A warm autumn day followed by a chilly autumn night motivates me to get into the field early the next morning. The reason for this is these are the conditions that create ground fog and mist. Capturing this mood with fall color added in as a bonus is a nature photographer’s dream. Preserving the moment is technically not difficult. Most of the exposures are pretty much straight forward unless the fog is backlit. If so, check your histogram to see how you need to compensate as shooting into the sun tends to produce underexposure. Compositionally, shoot it wide, shoot it tight, isolate a detail, shoot vertically and shoot horizontally. In other words, as I’ve often said so many times, “exhaust all possibilities.” These are magical conditions and you want to make sure you capture the moment. © 2007 Russ Burden Bring on the Overcast: If the weather deals me an overcast hand, I’ll take advantage of it and concentrate on just the leaves as the reds, yellows and oranges saturate well in this condition. The reason for this is glare from the sun that would otherwise rob the foliage of its saturation doesn’t factor into the equation. Depending on how gray it is, it will be necessary to add warmth to the photo in the form of a warming filter or setting the white balance to cloudy. The yellow imparted by the filter or the warmth imparted by the cloudy white balance setting helps negate the dull color of the gray sky that is cast over the landscape. If you encounter overcast skies, look for branches that are low growing and zero in on a single leaf or a clump that has a nice composition. Look toward the ground for the intimate landscape that may often go unnoticed. Red leaves nestled in pine needles, the veining of a single oak leaf, or a fallen log surrounded by an autumn mosaic are all wonderful subjects that deserve more than just a few pixels worth of capture. © 2007 Russ Burden To learn more about this topic, join me on one of my Photographic Nature Tours. Visit www.russburdenphotography.com and click on the NATURE TOURS button for more information. Also, pick up a copy of my book, Amphoto’s Complete Book of Photography. You can purchase a signed copy directly from me or visit your local book store or Amazon. Contact me at [email protected] to order your signed copy.
Fall Foliage, 2 of 3
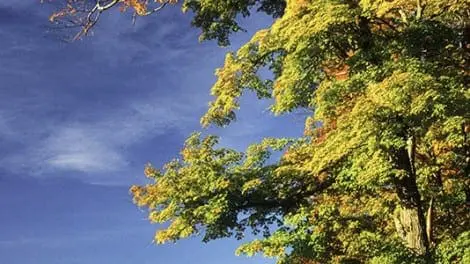
Fall Foliage Pointers: Part 2 of 3 by Russ Burden It’s autumn - the monochromatic green that dominated summer is giving way to nature’s magic as the environment is taking on a palette of warm tones and changing colors. For the photographer who loves color, it’s a glorious time. From the grand landscape to a lonely fallen red leaf to a child romping in a pile of freshly raked leaves, there’s a plethora of subject matter. Whether your passion lies in photographing nature, people, photo journalism, sports, etc., adding a background of fall color will make your images pop. There are so many tips I can share about taking fall photos that I’m dedicating the entire month of September’s weekly Tips to the subject. In this second installment of four, I will take you on a journey showing you how to improve your autumn photographs. Save or bookmark them and when the final installment is complete, you’ll have many tips to help you with your fall image making. Better yet, join me on one of my autumn nature photography tours so I can show you first hand my tips, tricks, and techniques - see last paragraph for info. Include Wildlife: If you’re a regular visitor to my Photo Tips and Techniques on Take Great Pictures, you’ve read something to the effect of, “the background is equally as important as the subject.” A fantastic subject shot against a busy background nets a busy image. A fantastic subject shot against a fantastic background produces a winner. I consider a good fall background to be fantastic. Including wildlife in a good autumn hued environment is special. Look for situations where the background can be thrown out of focus into a wash of color. Try to find the angle where the animal is surrounded with fall color. Look for a situation where you can have the coloring of the animal harmonize with the colors of fall. Be aware how the light on the animal plays against the light on the background. The best scenario is to have the primary light fall on the subject. © 2007 Russ Burden Control Depth Of Field: In some situations, as in the above example, it’s better to have an out of focus background that’s a wash of color that complements the subject. On the other hand, foreground to background sharpness is necessary when shooting the grand autumn landscape. The recipe for the out of focus scenario includes a long lens, a wide open aperture, and a subject that has separation from the background. All play into the mix and if one of the ingredients doesn’t fit, it impacts the “flavor” of the others. The recipe for the everything in focus image includes a wide angle lens, a small lens opening and the use of the hyperfocal setting on your lens. Given the amount of space, I don’t have the room to explain how to use this setting, but an internet search will net you many hits - type in Hyper Focal Distance. Better yet, join me on a nature tour and I’ll show you the process live. © 2007 Russ Burden Isolate Details: Most photographers tend to photograph the grand autumn landscape. A sweeping vista of maple covered New England mountains, a huge stands of aspens blanketing the Rockies, and the sprawling red tundra of the high country are fantastic subjects. If the conditions and light are right, I’d be right there filling many memory cards worth of pixels. But as you walk from composition to composition, rather than just look out onto the landscape, take a few steps and look down at the intimate details that await you on the ground. Look up at just a few majestically colored branches juxtaposed against a clear autumn blue sky. Quite often the quintessential fall photograph is above or below your line of vision. Don’t overlook the possibility of capturing an autumn slice of life image. So break out the macro or the long telephoto and fire away. © 2007 Russ Burden To learn more about this topic, join me on one of my Photographic Nature Tours. Visit www.russburdenphotography.com and click on the NATURE TOURS button for more information. Also, pick up a copy of my book, Amphoto’s Complete Book of Photography. You can purchase a signed copy directly from me or visit your local book store or Amazon. Contact me at [email protected] to order your signed copy.
Use your Macro Setting
Use your camera’s macro setting (the image of the little flower) for very close shots. Zooming in can often make even the most ordinary settings dramatic and beautiful. Natural light is often best for very close photos. Again, force your flash off and use a tripod or stable surface.
Make the Best of Natural Light
Take advantage of natural light. Natural lighting is soft, it creates dramatic and intimate settings. Force your camera’s flash off, and use a tripod or other stable surface to avoid camera shake. Use the ‘rule of thirds’ to create a more intriguing composition. Mentally (some cameras offer a display setting for this) divide the picture plane into thirds and place the subject in your photo at the intersection of a vertical and horizontal third.
Camera Care on the Road
Among travel photographers such as myself, camera maintenance falls into two categories, daily and location specific prep. Daily maintenance during a shoot is the usual: battery check, blow or brush dust off the sensor, wipe down the body to keep it clean, clean the lenses and filters etc. I perform these chores each day, no matter what the conditions. Specific environmental conditions will also dictate how I handle my equipment. If I am working in a humid, tropical area like the Yucatan Peninsula, photographing Mayan Ruins, I take heavy plastic bags and silica gel canisters. Moisture building up around circuits is a fast way to short out the camera’s electronics and humidity inside a lens can cause the elements to fog. Over time, moisture will allow fungus to grow inside the lens as well. © 2007 Chuck Place Each night, all my camera bodies and lenses go into a tightly sealed bag with a silica canister. Silica gel has an affinity for moisture and will absorb much of the moisture in the bag. These canisters are now built with an attached electrical plug. Each morning I merely plug the canister into a wall socket and a built-in heating element cooks off the absorbed moisture, drying the silica for the next night’s use. The second environmental condition with which I am very careful is condensation. This creates the same camera and lens problems as humidity, but is a very sudden phenomenon that needs to be anticipated by the photographer. © 2007 Chuck Place Condensation occurs when a cold surface comes into contact with humid air. Stepping out of an air conditioned room into a warm, muggy morning will always cause condensation to form on a camera and lens and, depending on the quality of the seals, even inside the equipment. I try to use air conditioning as little as possible, get out of the room a good hour before sunrise and leave my camera in the bag for the first 30 minutes. This gives my gear time to warm to air temperature, avoiding the problem. © 2007 Chuck Place The same problem can occur if you are stepping into a warm building on a cold winter day, maybe after photographing ice skaters. Your gear is cold from being outside all day and when you pull out the camera to download images, the relatively high moisture of a warm room will condense on the cold equipment. I merely leave my camera gear in the bag for an hour or two to let it warm up. In both cases, the cure is simple, but the photographer must anticipate the problem. Cleaning your gear after condensation forms can be a time consuming, and occasionally, expensive process.
Silhouetting during Sunset
Photograph in low light on purpose! To get the people silhouetted I exposed for the highlights on the water and opened up one f-stop; in-camera meters tend to want to expose whites as gray. Image was color tinted and vignetted to emphasize the mood of a dreamy summer day. It could be done with an orange filter on the (telephoto) lens, or in post-production in Photoshop, as was done with this image. A deep blue filter could make the image have a terrific moonlit feeling. Brisbane, Australia. © Chris Michaels, San Diego DPA Instructor
Using Flash and Colored Gels
Southwest Arizona: Composed using a tripod, flash, and colored gel filters. First, I taped a green gel filter onto a camera flash unit. Then, I manually fired the flash into the cactus while exposing for the background cactus and lights. Throwing colored light onto the same colored object will make that object super-saturated. The hardest part here was stringing those Christmas lights on the background cactus! © Chris Michaels, San Diego DPA Instructor

