DPA Magazine
Tips for Creating Active Summer Photos
Our contemporary lifestyles are anything but still, especially now. Summer can be the most physically active season of the year for many of us, so why not activate those summer-time photographs with a little motion-blur to convey those experiences to a viewer with a greater amount of expression? Using the property of implied motion in your photographs requires a bit more technical risk-taking in camera handling, but these images can be very rewarding. Excellent sharpness and stillness is something that most people expect to see, and what every camera manufacturer promises to deliver in a photograph. That makes sense, because as an image-saturated culture, we are conditioned to think that a still-camera is the tool for creating still pictures, whereas a motion-picture camera is the tool used for creating motion pictures. However, this rationale is just like telling a person that plays clarinet that their music sounds like a clarinet. Where in fact, if the artist knows how to control the instrument a clarinet is capable of playing in a very wide variety of genre, and a listener hears the music, not the clarinet. Musical instruments and cameras are merely high-precision, high-expense tools in which we invest time to get better at expressing ourselves with. For just a moment now, think of a recent time in which using a digital camera felt rather uneventful because the images downloaded didn’t convey the essence of what it felt like to be in the activity. Here’s my point… the next time out with the digital camera, put it into the Manual mode, and consider producing a few frames with some motion blur along with the reliable auto or program mode methods. Allowing yourself to twist the ideas of stillness and motion together, in creating a photograph, puts you on the path to creating a visual crescendo about the event. By the way, I am still looking very closely for the auto or program mode setting on my son’s clarinet. If you know where that button is, please let me know. Requirements: • Digital SLR Camera • Put the camera into its fully-manual mode, and have a good understanding of how the light meter functions. Being able to change the aperture and shutter speed independently allows you to control the camera, and provides an opportunity to be more creative. • Choose the slowest-speed ISO setting available on the digital camera (usually 100). Consider Implementing One of These Techniques: • Create motion-blur with naturally moving objects… —Tripod required. The movement of the palm trees was captured in the middle of the day by choosing a low ISO (50) and smallest-aperture opening on that lens (f/32). Using a Polarizer filter not only increases the image color saturation, it reduces the amount of light entering the lens, by 1.5 to 2 stops. Those three actions in reducing light creates the need to choose a very long shutter speed to achieve a normal exposure. In this case, the wind was strong and the exposure time was about 6 seconds long.
Find the Less Obvious Source, and use a Tripod!
Don′t forget your tripod! Using a slow shutter speed (in this case, 3.2 seconds) you can allow the water to blur as it moves during the exposure. When you have a slowly-moving body of water, this gives you an almost glassy reflective surface, which allows for a wonderful reflection of the background, in this instance the rocky walls of an abandoned quarry. And, you can sometimes come up with a surprise, as the buildup of exposure time gives a view not seen by the naked eye. In this case, the river seems to be inhabited by a ghost who is watching me work! Can you see him? Images © Michael Hart, Houston DPA Instructor
Using Fill Flash in Bright Sun
Using a fill flash, takes away "raccoon eyes" , which are a distraction to viewing the model in a portrait. Most point and shoot cameras have a fill flash option, as does the TZ3, and it is quick way to remove the distracting shadows from the face. Before After
The Perfect Sunrise
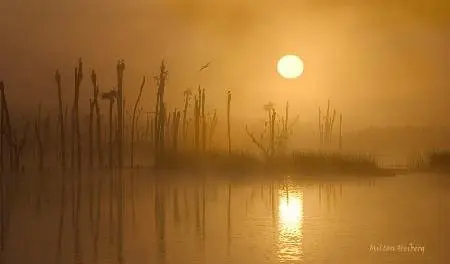
You’ve perhaps heard of the secret to good photojournalism—“f/8 and be there!” Well, the secret of good landscape photography is not much different—“f/22 and be there!” Probably the most important ingredient in a landscape photo is light. So be there when the light is right. For me that begins about 20 minutes before the sun comes up. In the summer that means getting up at 4:00 AM or earlier, driving 20 miles to Orlando Wetlands Park, and walking about a mile to my favorite sunrise spot. That brings up another ingredient—frequency. I took a tip from Ansel Adams many years ago. Have a favorite spot that you can call your own and be there often. If you have a favorite spot, don’t let the sun come up before you get there. The sun comes up every morning—so you really can’t call a great landscape “a lucky shot.” While good landscapes can be made at other times of day, the sunrise and sunset times of day give us the warm oblique light that enhances most subjects—whether or not the sun itself is in the picture. There are two reasons why I like sunrises better that sunsets. First, you have the solitude of a beautiful environment. No one else is crazy enough to get up at that hour, and this all belongs to you and the wildlife that you share it with. The other reason is—you don’t have to go home in the dark! Years ago I would carry a heavy 4x5 view camera and at least 20 sheets of Velvia-50 film, a heavy tripod, a camera bag/backpack, and lunch. Life is easier now. I still carry a large tripod—but it is carbon-fiber and a lot lighter. My digital camera equipment is a fraction of the weight of the view camera equipment. Lunch weighs about the same. Each semester, I bring my nature photography classes on 2 field trips to either Orlando Wetlands or Merritt Island National Wildlife Refuge. I get some grumbling when they hear of the arrival hour, but the grumbling goes away when the sun comes up. One woman, who had just turned 40, told me she had never gotten up that early in her life. She showed up. She announced to the class of about 7 people that this was the first time in her life she saw a sunrise. I had a new convert.
Kennesaw Mountain
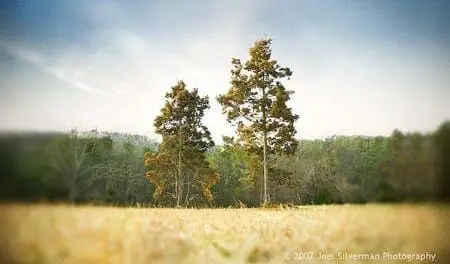
Landscapes in the tradition of Ansel Adams are traditionally tack-sharp from front to back, taken at a shallow depth-of-field like f16, f22, or higher. But rules are meant to be broken. This landscape of a historic Civil War battlefield on Georgia′s Kennesaw Mountain was taken with a shallow depth of field, accentuated by placing the camera only inches from the ground, and later blurred further in Photoshop to create a dreamy, impressionistic image that I consider a metaphor for marriage: two trees in a field, growing separately but together. Over the years they grow upwards independently, but their roots become intertwined and inseparable.
Capturing Waterfalls
Depending on the amount of spray it emits, you will need to bring an absorbent cloth to continuously wipe off your filter. This is especially true if you work close to the falling water. If you do work close to the water, be especially careful of your footing as the mossy ground can be very slippery. Although great waterfall shots can be made with a point and shoot, an SLR will benefit you tremendously as you can control the shutter speed dictating the look of the water. A slow shutter speed allows you to create a cotton candy effect giving the appearance of falling white lace rather than water. A fast shutter speed freezes the drops of the falls. The cotton candy effect conveys a tranquil feel while the frozen drop effect exudes power and strength. It’s a matter of personal taste as to which look you prefer although you’ll often find that the amount of light on the falls dictates the shutter speed. If there’s too much, you can add a neutral density filter to slow it down, but if there’s not enough and the goal is to shoot frozen drops, you’ll need to return when the light is more intense. © 2006 Russ Burden Other than an SLR, there are a few key pieces of equipment you’ll need to get good waterfall shots. A zoom lens will give lots of versatility with regards to composition. A tripod is a must to steady the camera when making long exposures. A polarizer is highly recommended as it will remove the glare from water covered rocks surrounding the falls. As you rotate it, you’ll be able to see the effect through the lens. The only drawback is the polarizer will eat up 1 1/2 stops of shutter speed so if the frozen drop effect is your goal, you may have to forego its use. If you’re shooting film, Velvia is the choice as the greens of the mosses and vegetation that surround the falls will be emphasized. © 2006 Russ Burden If you’re looking for lots of water, spring is the best time of year as the melting snows feed the falls and produce the most amount of flow. Autumn is not known for torrents of water, but surrounding fall color more than makes up for it. Winter can provide great mood shots especially after a fresh snow. If you’re photographing falls in a tropical area, the seasons won’t have much of an impact but there’s always a lot of water. If you live in an area where the seasons change, visit the falls throughout the year to catch it in different moods. A few ideas to think about when shooting waterfalls are depicted in the accompanying images. In photo number one, I used the leading line of the stream created by the falls to lead the eye up to the source of the water. In photo number 2, it pays to know the falls you’re going to photograph so you’ll know what time to be there when the daily rainbow appears. In photo number three, I zoomed into a small section of the falls to capture a simple cascade. © 2006 Russ Burden To learn more about this topic, join me on one of my Photographic Nature Tours. Visit www.russburdenphotography.com and click on the NATURE TOURS button for more information. Also, pick up a copy of my new book, Amphoto’s Complete Book of Photography. You can purchase a signed copy directly from me or visit your local book store or Amazon. Contact me at rburden@ecentral.com to order your signed copy. // We want your Opinion: close Which famous hamburger would you most want to photograph? - select one - The Guber Burger, Sedalia, MO Deep Fried Hamburger, Dyer’s Burgers, Memphis, TN The Original Burger, Louis’ Lunch, New Haven, CT The Butter Burger, Solly’s Grille, Milwaukee, WI Steamed Cheeseburger, Ted’s Steamed Cheeseburgers, Meriden, CT When you travel, what do you tend to photograph most? - select one - Family/Friends Architecture Natural Landscapes Events Art/Advertising/Signage //
Photographing inside Aquariums
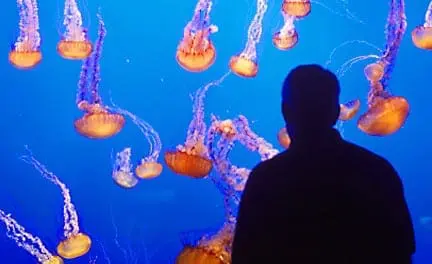
These jellyfish at the Monterey Bay Aquarium were almost hypnotic as their bodies pulsed through the water. The room was completely dark with daylight coming from above the tank. Due to the low light levels, I had to shoot with a tripod, which can be a real problem with people wandering through a dark room. Setting up at the far side of the room, away from the display, I used an 80-200mm zoom lens to tightly frame the sea creatures and visitors, while staying out of everyone′s way. Etiquette: Make sure that your local aquarium permits tripods before you setup the shot. Click on Tips and Tricks > The Allure of Water for more inspiration and lessons on technique for photographing water. © Chuck Place, Los Angeles DPA Instructor
How to Get Great Shots of Water
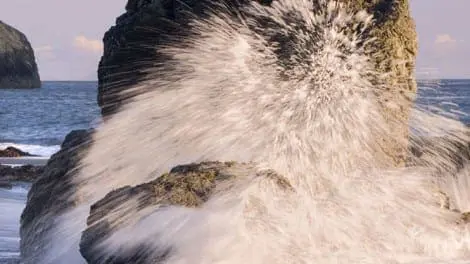
Without water, life as we know it wouldn’t exist. Humans are dependent upon it, plants must have it, aquatic life needs it. I know I state the obvious, but have you ever considered water to be a great photographic resource? Be it a running river, ocean waves, reflective puddle, or an offshoot such as a child playing with a hose, a backlit fountain, or a dog shaking himself dry after a swim, there are a myriad of opportunities to create magnificent images that relate to water. There are a number of ways to make your water shots stand out. The first has to do with shutter speeds. The faster the shutter speed, the more defined each drop will become. The faster the water is moving, the higher shutter speed that’s necessary to freeze the action. On the other hand, an exaggerated slow shutter speed can create a cotton candy effect on the water. For example, if you’re photographing a fast running waterfall, a shutter speed of 1/1000 is necessary to freeze the motion of the drops. But if you add neutral density filters allowing you to shoot at a shutter speed of 1/2 second or slower, the water will take on a cotton candy effect and you may even reveal the rocks over which the water flows. Another way to make your water shots better is to shoot late or early in the day. The reason for this is twofold. If you’re shooting a frontlit subject, the golden colors of sunrise and sunset bathe your subject in a pleasing warmth. The other reason is to create very dramatic backlit shots. Every drop of water becomes visible and prominent in the image. Each drop takes on a translucent quality making every drop a strong part of the image. Fountains, kids at fire hydrants, and splashing dogs are but a few ideas from where to start. Finally, consider the use of a polarizer to eliminate reflections and reduce glare. Not only will the colors be more saturated, the overall contrast of the image will be softened if the points of glare and reflectivity are removed. Simply rotate the polarizer while looking through the viewfinder until the glare is reduced. Depending on the angle at which your subject is to the camera, the effect may be very strong or barely visible. Images and text © Russ Burden 2007.
Pond Reflections
Reflections are one of my favorite subjects, but I like to combine foreground detail with reflected background. The trick is to find a pool of water that is in the shade with a background that is fully lit. This creates a mirror effect that is both beautiful and multi-layered. The heron was a bonus as it landed while I was bracketing exposures. Luck favors the prepared! © Chuck Place, Los Angeles DPA Instructor
Fun in the Pool
Photographing kids playing in a pool can produce wonderful summer memories. If you want the images to have impact, however, crop tight, use a fast shutter speed and be ready for that decisive moment. Picking a more neutral subject with which to set your exposure is also a good idea so that the brightly reflective water and bathing suites don′t cause you meter to underexpose the shots. © Chuck Place, Los Angeles DPA Instructor

