DPA Magazine
Kids in the Fall
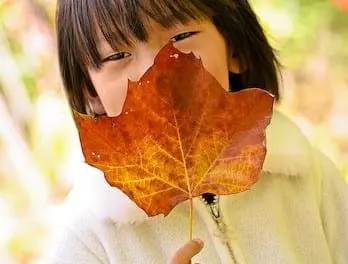
Fall is a great time to photograph kids playing outdoors! Let them do what they want - that includes jumping into piles of leaves, throwing them around, or just plain showing them the camera! © George Simian You′ll need to be quick on the shutter, and willing to shoot way too many frames, allowing for quite a few to be out-of-focus or motion-blurred, in order to have some great choice to pick from... Keep the camera is aperture-priority, with the lens set at its widest (smallest number), in order to get the highest shutter speed - kids don′t hold still!!! Shoot RAW, to allow yourself the luxury to fix exposure and white balance later, on your monitor.
Halloween House
While walking in my neighborhood, I spotted this house brightly decorated for Halloween. I knew it would lend itself well to shooting at the Magic Hour, because of the outdoor lighted decorations. The Magic Hour in photography is the portion of the day 30 minutes after sunset and 30 minutes before sunrise. During thus time the entire sky becomes a super large soft light source which has wonderful color and tonal qualities - plus dark enough to expose well without looking too washed out. It is the perfect time to capture both the available light (also referred to as the ambient light) from the setting sun, and the light from the decorations themselves. © Alex Lippisch With the Magic Hour timing is everything - literally! If I had waited much longer the sky would have been black and the trees, roof, and subtle details on the house lost. Shooting earlier would result in too much detail in the house and very little aura from the lighted decorations. As it turns out the house faces East, so that in the evening the sky would be lit up in the background through the trees, creating a haunting quality. Should you consider shooting during Magic Hour, make sure to bring a Tripod as the exposures can be very long. For this shot Evaluative metering indicated the required exposure to be a 15 sec shutter speed at f5.6. Looking at the histogram revealed that part of the decoration lights were clipped to white which I decided would be acceptable. For the best image quality I shot at ISO 100 in the RAW mode, and planned to adjust the White Balance to suit when I was working with the image in the Raw conversion software.
Autumn Details
Autumn is a great time of year to photograph details! One way to do that is to pull out the macro lens. © Jessica Lifland Also, the days are getting shorter and the light is getting better as the sun spends more time lower in the sky, giving us good photo light for longer. © Jessica Lifland
Photographing Children
When I work with children, I often try to make as much eye contact as possible instead of burying my head behind the viewfinder. This works well with adults, but is particularly important with younger ones. © Nathan Rapheld If a child is timid or shy, including them in the process—letting them see a few shots, allowing them to take a picture—can warm them up to you, but be careful, this can backfire if, after that, all they want to do is play with your camera. © Nathan Rapheld Keep in mind that their attention span is short which limits the time you can spend taking controlled portraits. When they lose interest in sitting for a portrait, follow them around for awhile, capture them in more candid settings. These are often the best shots. © Nathan Rapheld
LensBaby & Kids
Photographing kids is all about treating them as equals - get down to their level, see the world from their point of view, match their energy level, and shoot lots and lots and lots of frames!!! This requires quite a bit of confidence in your camera skills, as this is not the time to ask for a "hold it while I focus/check my exposure/set my white balance/compose with the rule of thirds"... this is the time to get down, move fast, laugh out loud, and keep hitting that shutter button, counting on the skills you′ve honed with more static subjects (like grownups...) © George Simian © George Simian One of my favorite tools to use with kids is a LensBaby - that′s a very basic, all manual lens, that has been intentionally build without any correction for focus curvature, aberrations, etc, etc. It′s simply the bottom of a Coke bottle, glued to the end of a short rubber hose - you grab it, push and pull on it till the key part of the image (the kid′s eyes) look in focus, and hit the shutter! © George Simian © George Simian It helps to have your camera set on 8 frames/second, and shoot a long burst, while gently letting go of the lens, to hopefully hit that sweet focus shot... Pulling the lens into the body of the camera is necessary to get it to focus (as the lens starts out far enough to focus on about 2 feet away), but if you pull too hard, you′ll wind up focusing behind the subject! © George Simian © George Simian Our modern auto-focus cameras have very bright screens, with very low contrast, which makes it pretty much impossible to critically judge manual focus - if you are truly obsessed (as I am), you′ll find that you′ll get a very, very low percentage of correctly focused images. © George Simian The lens has a manually changed aperture disk, as did lenses in the mid-19th century - but you′ll quickly pick your best loved effect (from no aperture disk=F2.0, all the way to F16 - mine is usually F5.6), and then use either Aperture Priority, or just good old manual exposure (for those of us who remember how to use film....). © George Simian The lens has a very high level of flare, so you don′t need to overexpose (as you normally do in digital, to insure sufficient shadow detail), but do shoot nothing but RAW! You′ll later need to bring up the Black levels, play with curves to increase the contrast, and struggle with the white balance (as the flare can contaminate the color, as well). It helps if you′re aiming for pleasing, warm color (though I have shot some jobs with it, too, where I′ve gone to great lengths to gobo the lens). © George Simian © George Simian If you do want to use it for commercial shoots (or any shoot where you have complete control - that′d rule out any live child), buy the 3G model, which has 3 metal rods to lock down the lens position, and a very limited helical screw mount, to tweak the focus - it works much better for control and repeatability, but is way, way too slow for shooting live kids - stick with the 2G model, the simple hose.... I use both, as the situation demands, and can′t say enough good things about them! © George Simian © George Simian
Hangin′ With the Teens
Getting your teenager- or anyone′s teenager to sit still for a photograph can be agonizing for all involved. Instead, invite yourself to accompany them to their hangout. Offer to buy the popcorn, or the movie tickets. Or take them someplace they′ve wanted to go but can′t get to without an adult and bargain for the right to photograph them. They′ll mug for the camera until they get really bored. Then you can really start to photograph. This photograph was made on a summer evening in 2007 at a drive in theater -- see, they need a car to get there! © Hinda Schuman
Baby & Toddler Shots
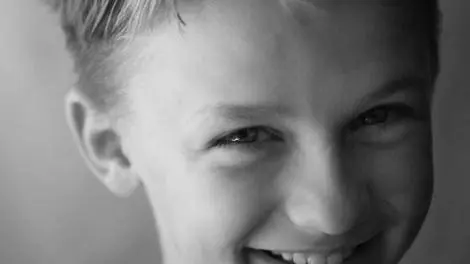
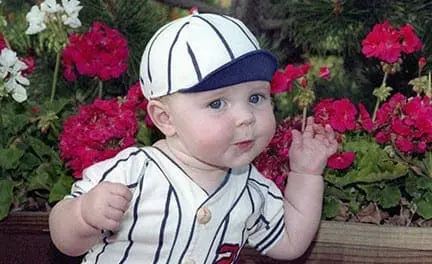
Young children are a favorite subject for both amateur and professional photographers. As a subject, kids are adorable, funny, precious, and intriguing. But they also move quickly, are temperamental, have short attention spans, and tire fast. These factors present quite a challenge for such a tiny subject. But the reward of capturing a great shot makes the exhausting pursuit worth the effort. Whether it’s a fantastic shot of one of your own, an awe inspiring photo of a friend’s child, or if you’re doing it professionally, use the following tips to give you the motivation to keep producing winners. © Russ Burden CLOTHING: When you know you’ll be working with little kids, make sure they are dressed to bring out their best. Keep the clothing simple as it shouldn’t be the focus of the image. Solid colors work well. Work with primaries as they tend to be simple, colorful and won’t compete for attention with the subject. The busier the attire, the more confusing the image becomes to the viewer. Make sure the clothes fit the environment in which the baby will be photographed. If the baby is wearing patterns that are busy and is then placed in a setting with a busy background, the result is patterned chaos. If the baby has wide and colorful eyes, matching the clothing to the eye color works well. © Russ Burden SCHEDULE: Learn the young child’s schedule unless photographing a cranky subject is your thing. This means working around its feeding time, nap time, and active time. If the child is yours, it makes the job easier as you’re there to work when the child is ready. If you’re working with a friend’s or client’s child, find out when the child naps, eats, and is most active. I find the best times to work with young kids is after their nap and they’ve just had a snack or two. I then give them a bit of play time so they’re not at their most active point. This play period often presents great candid opportunities as I have the parent play with the child which gives me great candid moments of the parent and child interacting. © Russ Burden EQUIPMENT: Depending on the activity I want to photograph, I either use window light or flash. If the child is a bit older and can stay still for short periods of time, window light works well to give mood to the image. If it’s a formal shot, and I need precise lighting, I bring the subject into the studio. If I want to create more of a candid appearance, I’ll often work outdoors and use fill flash to soften the contrast of a bright sunny day. In the images that accompany this article, the first shot was done as the mother and child were interacting. I did use straight flash as I was simply concentrating on candids and the parent loved the frozen moment. The second one was made on a bright overcast day and I used a bit of fill to bring out the fantastic expression of the young boy. The third photo is an example of using flash outdoors. In that the boy was wearing a baseball style cap, I needed a lot of fill to overpower the strong shadow across the subject’s face. I dialed in plus 1/3 and it created a nice overall balance. With regards to a lens, I strongly encourage the use of a zoom as it will give you diversity to modify the composition of your fast moving subject.
Portrait Rule of Thirds
I’ve been teaching the “Portrait Rule-of-Thirds” for about 35 years. You won’t find it any book unless it was written by one of my former students. When I was a teenager my father taught it to me when he handed me 300 studio portraits to be sized and cropped for a journal to be printed by our family printing business. The rule is: Place the bridge of the nose one third down and centered vertically. The rule applies for all individual subject portraits whether it is a face shot, head and shoulders, waist . . ., or if it s head on, 3/4 angle, profile, or anything in between. It allows proper breathing space in the ¾ angle shots and especially the profiles. In creative work this rule is flexible of course, and considered a starting point.
Photographing Pets with Short and Long Shutter Speeds
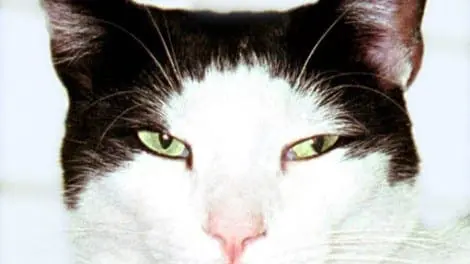
Pets have personalities, and sometimes that personality shows through in the face, and the eyes. A straight forward head shot of a pet with a clean background sometimes can say a lot about the personality (animality?) of the subject. This handsome and smart cat, Sam, was shot with a portrait lens, with natural light coming through a window and fill flash – used with the hope of freezing any movement and highlighting his white parts. The background was a white canvas backdrop. He was asked to sit still, which he did for about 1/125th of a second. Just long enough! Using a slow shutter speed (.3 of a second) and a little camera movement Sam, the wonderful cat, was photographed in the garden upon his return from a hunt. I was playing around with blurring the image and this sort of picture has a lot of trial and error to it. One can never really be sure what will happen, as each camera movement is slightly different from the one before, or the one after. My suggestion is to play around with moving the camera left to right, up and down, and varying the shutter speed. It is a photograph that is less about a specific cat and more about color and movement.
Hints for Better Pet Photos
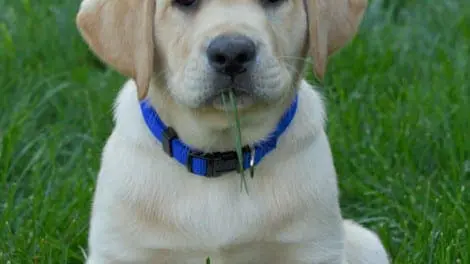
Hint 1 – Get down to their level. Your pet photos will be much more interesting and attention grabbing if you shoot from their level. Just like children, looking down from above minimizes the size and importance of your subject unless you’re trying for a specific effect. For this image, I laid down on the grass in front of the puppy, letting him fill the frame. Hint 2 – Be prepared for anything. Pets will do the darnedest things when you’re least expecting it. Have a camera with you and be ready to grab a shot, like this one of one of our dogs after he fell face first into the mud. This is the kind of image that will bring back happy memories years later.

