DPA Magazine
Hints for Better Pet Photos
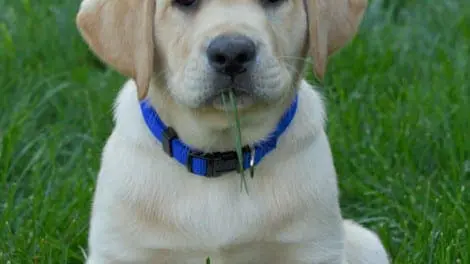
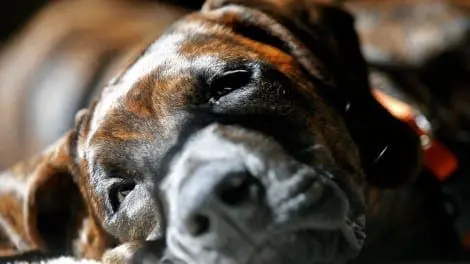
Hint 1 – Get down to their level. Your pet photos will be much more interesting and attention grabbing if you shoot from their level. Just like children, looking down from above minimizes the size and importance of your subject unless you’re trying for a specific effect. For this image, I laid down on the grass in front of the puppy, letting him fill the frame. Hint 2 – Be prepared for anything. Pets will do the darnedest things when you’re least expecting it. Have a camera with you and be ready to grab a shot, like this one of one of our dogs after he fell face first into the mud. This is the kind of image that will bring back happy memories years later.
Cats Being Themselves
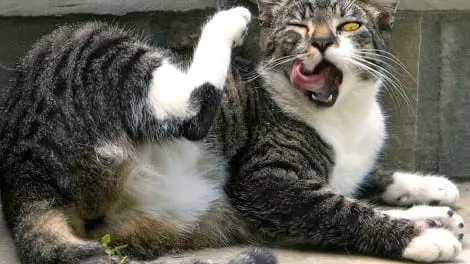
Cats, being very independent creatures, are not always the easiest subjects to photograph. The best photo-ops are when they are just being themselves. If you have patience and perseverance they will eventually put on their own show. Some comical and goofy images will result. I followed this cat, but stayed back a bit. She knew I was there but I was far away enough not to impose on her routine. I used a 70-200mm lens with a 2x extender that gave me a good range of coverage. I was able to get the whole scene and still zoom in for the details of her expressions. The best situation for lighting in this case was in overcast daylight. Direct sun would have “blown out” the white fur and caused harsh shadows. Also, I like to allow a little bit of space around the image while shooting. This gives me an opportunity to second-guess my composition and balance by cropping in Photoshop.
A More Personal Vantage Point
If there is one thing out there that is photographed heavily, it is our pets. Every pet owner from Aunt Sally to your neighbor Chris all take pictures of there pets, the trick is to do it better then every one else! I love animals, always have always will. But if there is one thing that gets me, it′s the same cliche photo of someone′s cat or cute dog taken 30-feet away from a high view point. Why, because that′s where the photographer was standing when they saw their pet playing with a ball of yarn or a butterfly. Well folks it′s time break that habit, I mean - they are your pets - they know you! Get in there and get personal! My main tip for this situation is get on there level don’t always photograph from the standing up perspective, or bird′s eye view. One sure way to make a picture better is get on the same level as the subject you are photographing. Here is my 14-week-old puppy, Jiro, enjoying the summer sun in my living room. For this picture, I got on the ground and zoomed in with a 200mm lens to get a shot of him relaxing. Very simple and yet very effective.
Tips for Shooting Pets
Shooting pets can be one of the most rewarding types of photography one can do, but it’s not so simple as it may seem. Just try getting a kitten or frisky young puppy to hold still long enough to focus and get off a shot and you’ll immediately know what I’m talking about. They move….and very quickly. One way to solve this problem is to restrict the areas into which your subject can bolt. Some of the ways I’ve accomplished this task are to place kittens in baskets and puppies in buckets, nestled into the back of wingback chairs, placed on picnic tables, or even on stumps tall enough to make them think before leaping off. Kitties are just as difficult to corral and wrangle, but they too can be confined to a specific area, giving you enough time to photograph them before they have a chance to remove themselves from their portrait sitting. Personally, I love the fence concept because your kitty is free to move about, back and forth, but always at the same distance from the camera, give or take a few inches. Peeking out from tall boots or and even sitting on top of their dog houses might also work. Getting help from the pet owner, or even a friend if it’s your own animal is a must for shooting animals. It will not only make the shoot go easier, it will be a lot of fun. Your assistant will probably be the most important part of your shoot, beside your pet subject. They will gather up the loose little ones and return them to the set or area you’re shooting them in. They will be there to hold a reflector, which may either be your main light if the sun is at the back of the animal, or the source of a catch-light in their eyes. {A catch-light is the bright specular highlight in the eye that gives it it’s “twinkle”. It adds a lot of life to a photo and is a good thing to try and have). Remember to focus on the eye nearest the camera. It’s difficult to do close-ups that aren’t looking squarely and directly at the face, in which both eyes are in focus. When presented that choice, just remember to focus on the eye nearest you. Your assistant can also distract your pet with either a toy (squeaky ones work great with dogs but can scare cats away) or small treats. The best treats are ones which can be gobbled and not chewed. Rewards are quick and you waste no time waiting for them to finish. This kind of assistance should also allow for some more or less candid photography as your pet is now paying attention to the food and/or toy provider and not worrying about you and the camera you’re pointing at it. This assistant might also carefully hold your pet, hiding their hands in such a way as to enable you to shoot a portrait with an uncomplicated or uncluttered background and no obvious fingers. Other tips for shooting your pets might be to include other members of your family with them. The interactions can be fun as well as providing some idea of scale.
Rupurt Luxuriates, The Natural Light Cat
If going for a more laid back and intimate image of your pet, probably best to switch off that FLASH. Nothing spoils the mood like a huge burst from your flash gun. I found Rupert here lying around on the sofa, but he was swamped in darkness. Instead of using flash, I turned on a nearby lamp for illumination. I also adjusted my White Balance for tungsten light. The other smart bit (thanks to his friendly and wise owner) was letting Rupert sniff or explore the camera a bit. I know it sounds crazy, but if you come in with your face concealed behind a big camera (and clicking off frame after noisy frame), you are bound to scare your poor subject away. I set the camera next to him, he sniffed and then ignored it. Sitting as he was, I composed him into his full and rich, embroidered couch environment. I noticed that his ears would perk up each time my auto-focus chimed. A welcome way to get an attentive looking tabby.
Photographing Pets
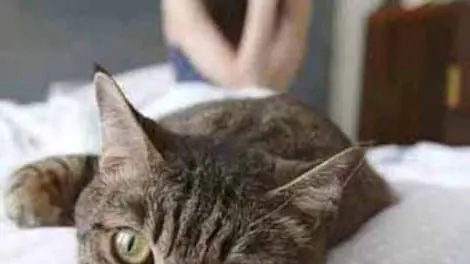
When shooting your pets its a great idea to shoot a number of photos. If you shoot a few horizontal and a few vertical, and shoot at different times of the day (especially with light coming in the windows) you′ll find you get better results. Try shooting the pet from a number of different angles and camera positions. Get in close. Many people photograph their pets from too far away, include the whole back yard when they really just want a photo of the dog. You should shoot a wide shot or two but get in tight on the pets face for a couple of frames. You will also get better shots if you avoid using the flash indoors. The flash makes the light look harsh in this type of photo. You′re better using natural light when shooting pets. Try opening window blinds, and turning on all the lights in the room in addition to using a higher ISO to shoot without flash. Cats are easy to shoot if they′re napping (they are generally lazy so its not too difficult). Dogs often move around a lot more and you may be better photographing them outdoors where there is more light. If you are shooting with a limited depth of field (f4 or less) focus on the animals eyes. If the eyes are in focus the rest of the pet can be a little soft focus and it still looks good (sometimes better). Change your perspective, get down to the animal eye view, at eye level with the pet. In this photo the camera was slightly below the cat and looking up. This makes much more of a connection in the photo than if you were standing up and looking down at the cat. It also makes for an interesting background. This photo of the cat with the family was shot by my wife Tracy Adler who is not a professional photographer. Its a really good photo because all the elements came together. The focus (literally and figuratively) is on our son, Luke. But the cat is fully in the photo. A lot of people would have cut the cats head off in the framing when taking this shot. Try to see the whole photo when you are framing, look at the edges as well as the middle of the frame.
Kitten Wrangler
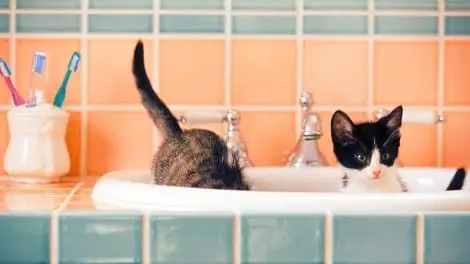
My wife and I foster wild kittens and find them good homes. As you might imagine, I photograph many of these kittens and although I use a range of equipment for this type of shoot, there is one essential that makes it all possible—a kitten wrangler. Kittens have two natural states—playing and sleeping. There is little in between. Photographing a sleeping kitten is pretty easy, but capturing kittens in motion takes a lot of hands. My office manager usually takes the job of kitten wrangler, confining our models to a particular area, which is either dictated by lighting or props. We decide on the boundary of the shooting area and it is the wrangler’s job to make sure kittens stay within those bounds. Kittens can only be controlled to a certain point, but a wrangler ensures that the models will remain in the frame at least. Beyond that, it’s a game of luck—and lots of fun, of course.
A Visual Haiku
This assignment is intended to encourage approaches to the seeing and interpretation of subject matter with as little visual information as possible. It is a technique that can be used not only in your own backyard, but while traveling too. This may sound ridiculous, but have you ever felt overwhelmed arriving at a beautiful location, and then not knowing what to photograph? Then consider this. There is a method of composition and image construction commonly known in the world of visual art as working subtractively. Think of how other visual artists — like a painter — start with nothing, and through the act of adding subject matter and use of the media itself, form it into an image. Contrarily, photographers typically start with everything, and need to be selective about what to put in the frame. The challenge we need to resolve is a matter of reducing the subject matter down to more simple forms, to capture the essence of moment. To produce images with as little as two or three major elements of design. If we were to make it a priority to create photographic compositions that are analogous to composing a form of Japanese poetry know as Haiku, then the potential of reducing the subject matter, and producing idea driven work is increased. Think of what you do with the camera as not merely a process of recording facts. Revealing a point of view on the facts is what we are in pursuit of. As a visual artist it is far more compelling to ask questions with images, instead of providing answers. Haiku is a minimalist form of poetry. The writer has 17 or fewer syllables through which to convey an experience. Writing haiku is a form of meditation that begins with the recognition of something occurring in the everyday. Here’s a translation of a Japanese haiku master, Issa. In English it has nine syllables. reed warblers sing the great river still Definition of Haiku • The content of haiku is typically focused on lyrical moments of everyday life. • The subject matter can be rooted in the experience of other sensory experiences to inform its visual appearance, such as hearing, taste, touching, smelling, and seeing. • The subject matter is traditionally focused on the natural world, but do not let this restrict you to photographing what you want. The subject matter can be anything. Haiku was created several centuries ago by a monk named Basho, who lived in and among the elements of the natural world everyday — what we have access to today in contemporary culture flies in the face of the original intent of haiku.
A Postcard Home
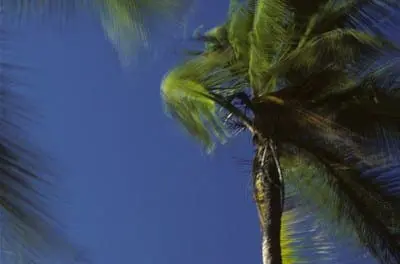
The physical and mental transition of arriving in a foreign culture is probably one of the most visceral things a person can do. It is an over stimulation of the senses that is twisted together with the emotional polarities of great excitement and bewildering confusion. Somehow all the weeks of preparation appear to have only scratched the surface of an incredibly complex culture — such as Japan — and suddenly the sights, sounds, tastes, and textures of your life have access to dramatically different source materials, compared to what’s at home. As a visual artist the challenge you are presented with while dealing with this emotional melting pot, is trying to have something to say about the country and culture with your photographs. If your intuitive responses can be first articulated into words, then bringing the camera up to those ideas later can provide images with a stronger voice to convey ideas. Developing a list of adjectives can enable a profound rationale to be there, and useful mental triggers — key ideas — to take action on. Your triggers can provide some sense of clarity and selectivity among the daily, sensational barrage; forming a mission, and perhaps even a safe place of consolation if things get overwhelming. Ultimately, you can have something to say with images — which to an artist matters the most — and form images with greater purpose and meaning. Procedures —At some point during the day, give yourself physical and mental space to spend at least a half hour alone, in one place. Get a cup of tea, or just hang out on a street corner. —Write the postcard home to yourself: On the postcard describe things to yourself, name/label/catalog things that you are experiencing. Describe each sensory facility — touch, smell, taste, sound, and lastly vision — to articulate a purely intuitive level of response to being in this new culture. —What intrigues you the most, now that you are actually here? Is it the food, the people, the architecture, the natural areas, etc. —Also write these triggers down on a blank index card, and then keep this card with your camera. It can help remind you of some critical first impressions about the culture, because as the trip unfolds, things like this can get lost in the sensory overload. Consider writing these ideas down in a journal as well. — Mail the postcard home to yourself, and it will be waiting for you when you arrive home. There is no substitute for those very first impressions of a foreign culture, and to have made the opportunity to trap those ideas in words is priceless. —Use a trigger as a starting point to visually interpret your words. Attempt to create images that convey the essence of what you’ve written down. Consider sharing some of these ideas with your fellow travelers to further process the sensory experiences. Class critique time during a photography workshop is the perfect way to facilitate this. —One rule to consider giving yourself is limiting the physical distance between the camera and the subject matter. For example, establish a time window (ten minutes, one hour, or one day) where you cannot photograph anything that is more than one meter away. Ernst Haas said, “one of the best lenses you have is your feet.” —Say for instance that you’ve chosen the adjective windy; then how can you interpret and capture the essence of wind in a photograph?
Signage
Photographing signs you might come across in a city can help tell a story about it. Sometimes the signs themselves are interesting enough. If you want to say more with the picture, see if the subject matter behind the sign is related to it. Neon signage will yield some of the most saturated color there is. With neon, you may want to try a few different exposures to see which help the sign read best. China Town, San Francisco Ethnic Neighborhood Signs, San Francisco Pike Market Place, Seattle Los Angeles © Chris Michaels, San Diego DPA Instructor

